Challenge4
Micro Challenge 4
Link to repo:
https://github.com/chris-ernst/hybrid-ecosystems
Building a bio-based MIDI controller for an interactive audiovisual performance
Fab Challenge 4 Summary from Christian Ernst on Vimeo.
Tati, Joaco and Chris are building a bio-based A/V interface.
Basic structure:
Inputs (buttons) PCB Outputs (Audio & Visuals) In this documentation we will focus on the fabrication of the controller and the electronics as this was the main focus this week, but we will also touch upon wireless communication protocols.
How can we rethink a musical instrument? What are inputs, and how can they change shape and colors? How can we create engaging, collborative interactions with a button board?
We wanted to make a modular button input system. After initially thinking about producing some sort of playable MIDI keyboard, we thought it could be interesting to incorporate two of Akasha hub’s values into the design: decentralisation & sustainable relationships. So we designed the possibility for distributed buttons (which could be placed together with magnets or farther away) and rethought the buttons’ materiality by using biomaterials.
We were inspired by the structure a visual aspect of beehives, which is why we ended up going for the hexagonic shape.
For the challenge we wanted to test out a diversity of inputs: we selected a “normal” clicking button, a potentiometer and a pressure sensor. This way, we could get a good understanding of each one and simply scale up the process based on our needs in the future.
Purpose: What is it supposed to do? These buttons would then trigger visuals through Touchdesigner and audio through Ableton, at the same time, through TDAbleton protocols using wireless communication through IP addresses.
ACADEMIC LEVEL
Long term dissemination plan
explain the strategy you will use to share with future users your project (licences, tools, communication, etc)
Easy to scale up: we already have the 3D files for a button, potentiometer and pressure sensor, so it is only a matter of repeating the 3D printing.
As for the audiovisual files, Touchdesigner is free for personal use and has a very active community, so we could post the file on TD forums for people to use and learn. Ableton, on the other hand is very not open source and expensive, so it wouldn’t be easy to share that with people who do not have a license for it.
Our research areas are very similar, even though we hav different focal points. The common areas are music, sustainability, environmental awareness, multimedia installations, interaction design, ecologies and audiovisuals. Our individual niches and specialties are
Juaco: sound, digital fabrication, matter & sound, sonar art, biofabrication and cognition Tatiana: interactive installations, creative coding, symbiotic relationships, fractals, biomaterials and the one and only Touchdesigner <3 Chris: ML training, Autonomous tech, democratising tech, bridging gaps between disciplines, generative music. We’ve liked working together because we manage to each find a way to reach a common objective (Audiovisual VJ set with biomaterials) without compromising our specific interests (bio fabrication, creative coding, generative music etc.).
Show how your team planned and executed the project We divided the group based on skills and interests: Juaco worked on the 3D printing, moulding & casting and soldering, Chris worked on the electronics, pcb milling and Ableton sountrack and Tatiana figured out how to structure the pipeline in Touchdesigner to receive, remap and send data through various protocols. We often teamed up and helped each other out on various tasks but generally, we can say that our biggest tasks were digital fabrication, biomaterial moulding, PCB milling, electronics, wireless communications, audio & visuals generation.
System diagram (illustration explaining function, parts, and relations)
All the buttons are connected to Arduino that is communicating the data to Touchdesigner. Each button triggers a visual + sound and each potentiomenter changes the color, shape and pitch.
BOM (Build of Materials) Material used:
3 buttons 3 potentiometers 1 touch sensor biomaterials 3D materials for printing models for moulding and casting 3D materials for printing the box cables screws Arduino board Button board
This button board requires 3D modelling, molding and casting, electronics.
Integrated Design (How you designed it - relation between elements) The input (button, rotor, pressure sensor) has a 3D printed case which keeps it stable and allows us to place it where we want. It is connected to the arduino (Code found in project files) which communicates the data into touchdesigner. This data is either binary, 0/1 for the button, or a range, like 0-1023 for the rotary knob. This data is remapped in Touchdesigner according to our needs: for example, 0-1023 is remapped to 1-360 in order for the rotary knob to change the hue of the colour selected in the visual. The buttons activate the visuals in Touchdesigner, but also simulatenously send midi values to ableton thanks to the TDAbleton link we set up for the two softwares to communicate.
Honest Design (use of technology in a meaningful way) Relation to the topics We believe the technology was used in a meaningful way because we thought about how to conceptually match our vision with the experience. In other words, since we want participants to think about how technology, art and nature are connected in a collaborative way, we wanted this to be reflected in the button board itself, which is why we chose to make it decentralised with biomaterial and electronic components.
Be creative (find solutions with materials and technology you have) We were creative in our approach and execution of the product, starting from the sketches, to the cardboard prototype and finally the product itself.
Explore design boundaries (based on your expertise) We were unfamiliar with OSC and IP communication protocols, so this was an area we really had to push ourselves in, but it ended up being very beneficial.
Listed future development opportunity for this project We want to scale up this project to 9 buttons, 3 rotary knobs and even plants, so that we can have a big, multi-person, interactive jamming board.
REPLICABILITY
How did you fabricate it (fabrication processes and materials) All of the files are inside the folder.
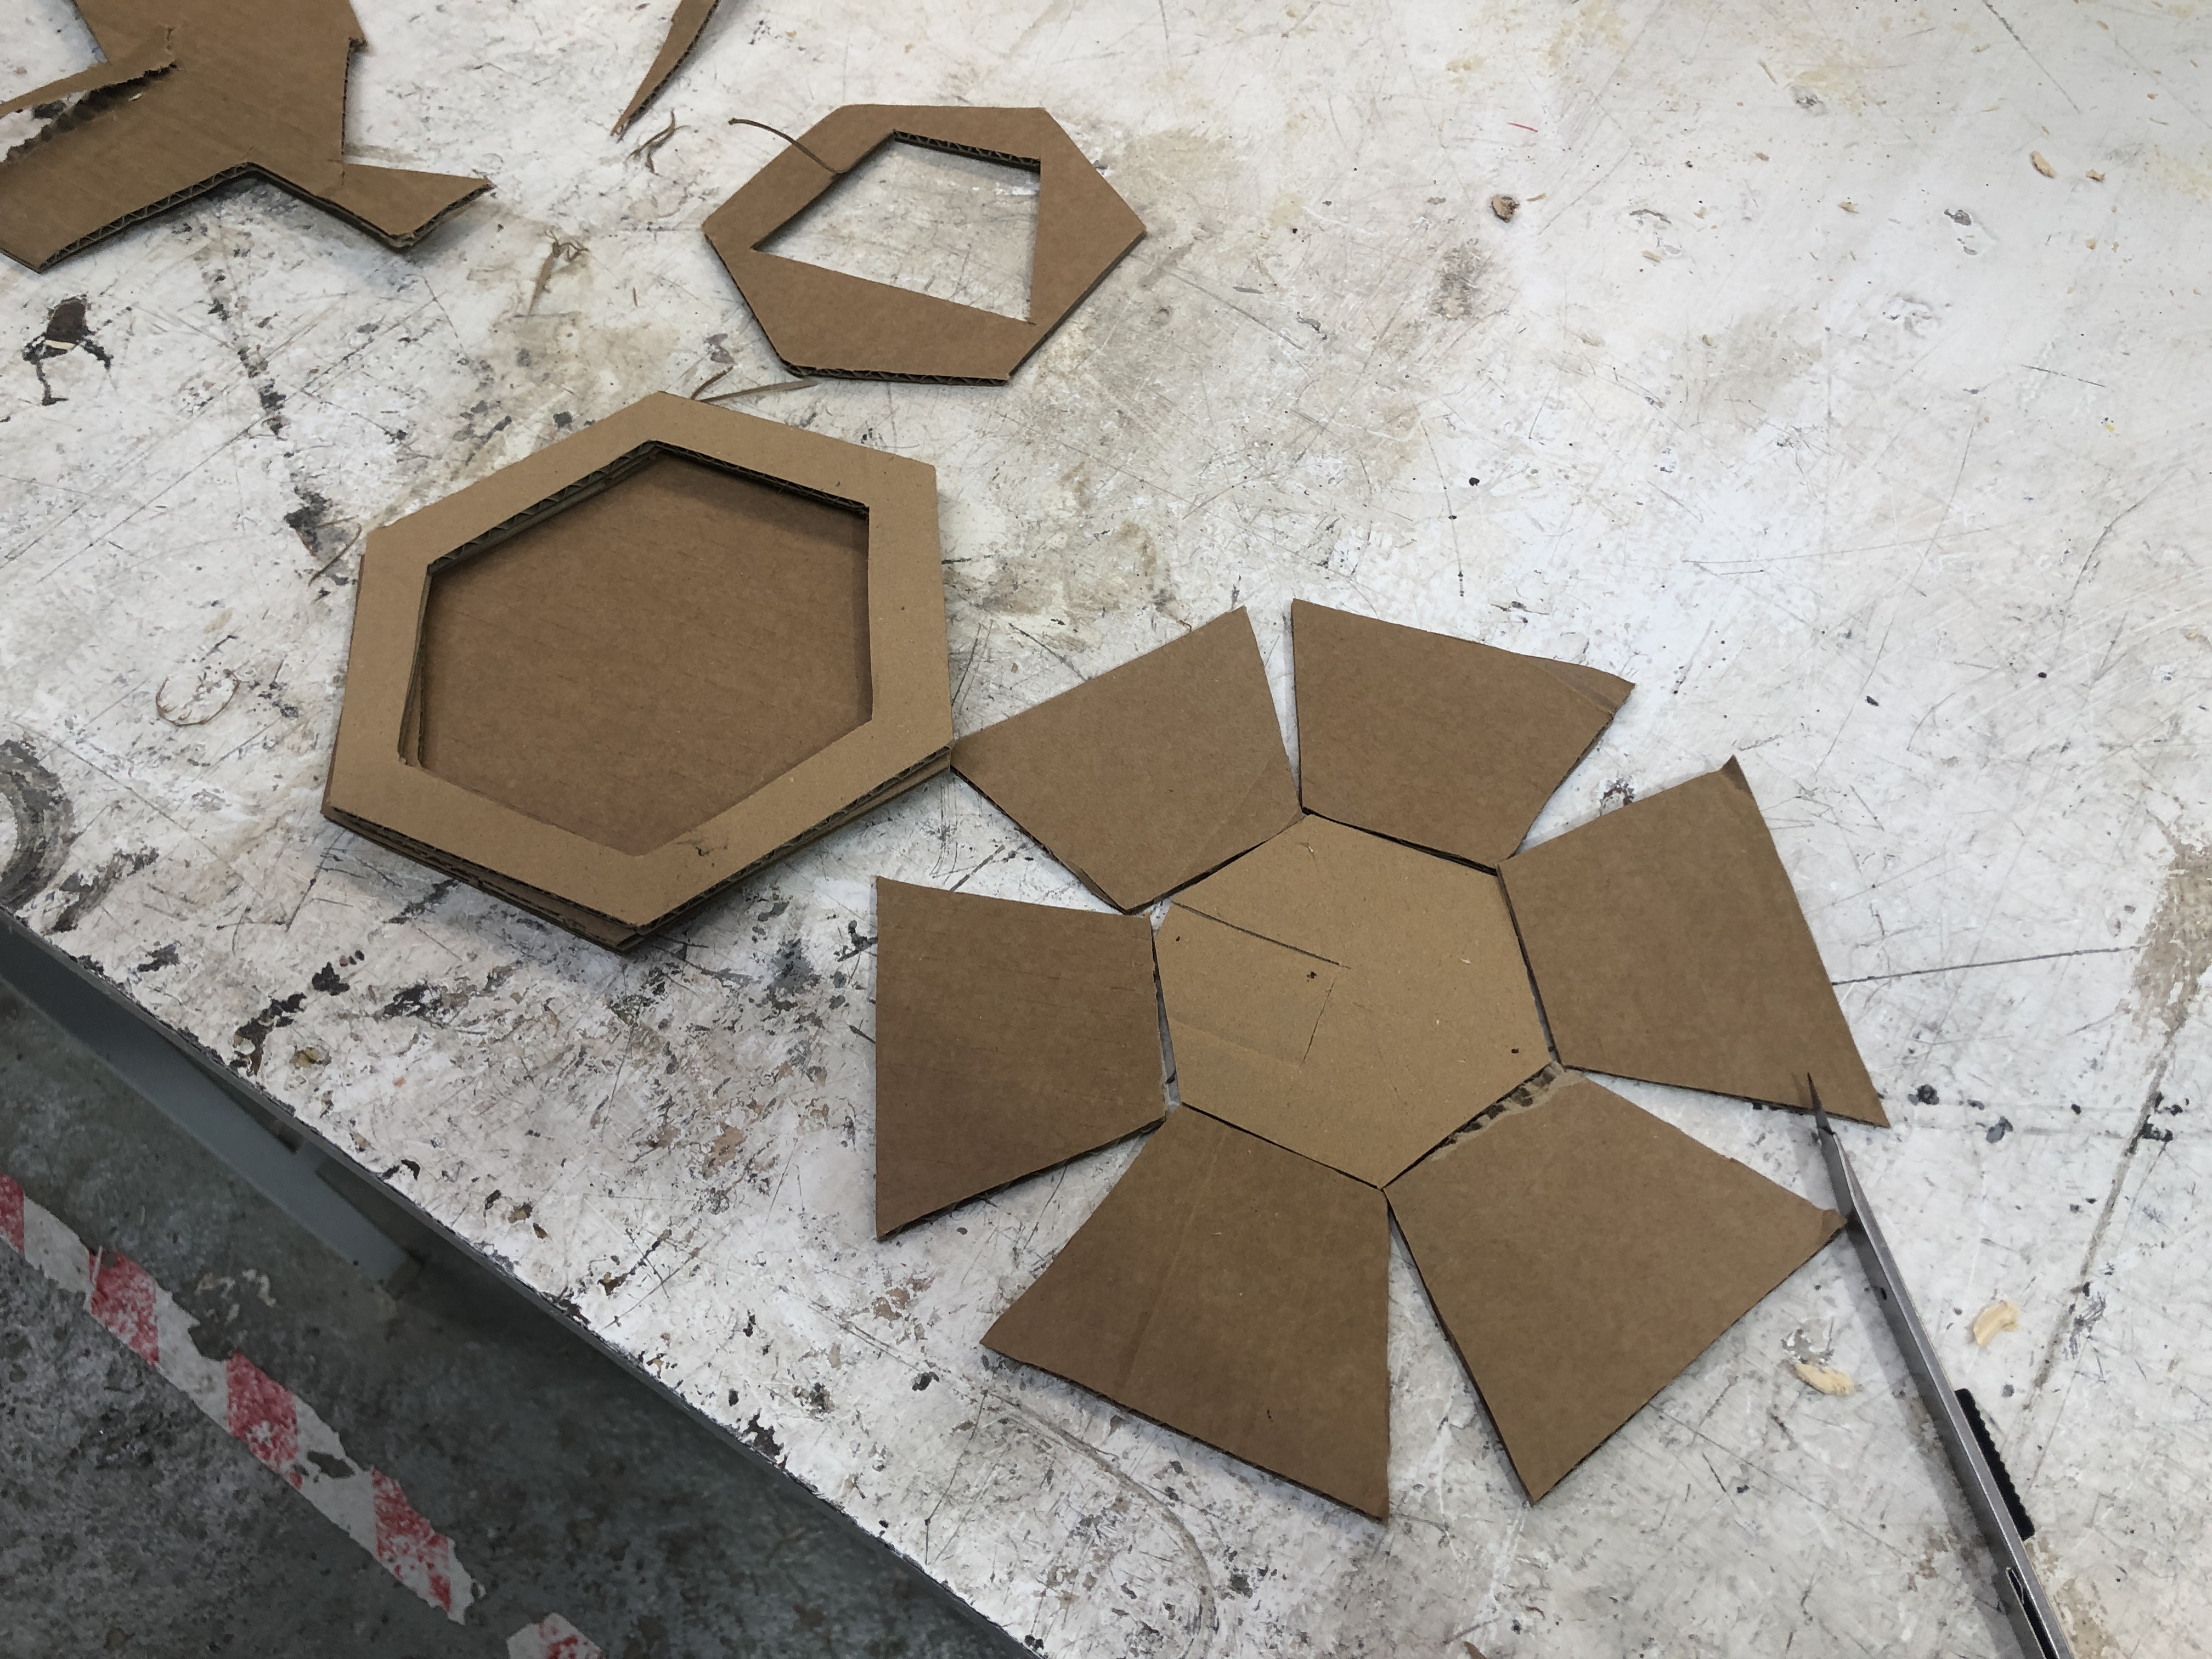
Juaco started out by prototyping the button cases in cardboard, and surely enough he whipped up a great prototype out of nowhere.
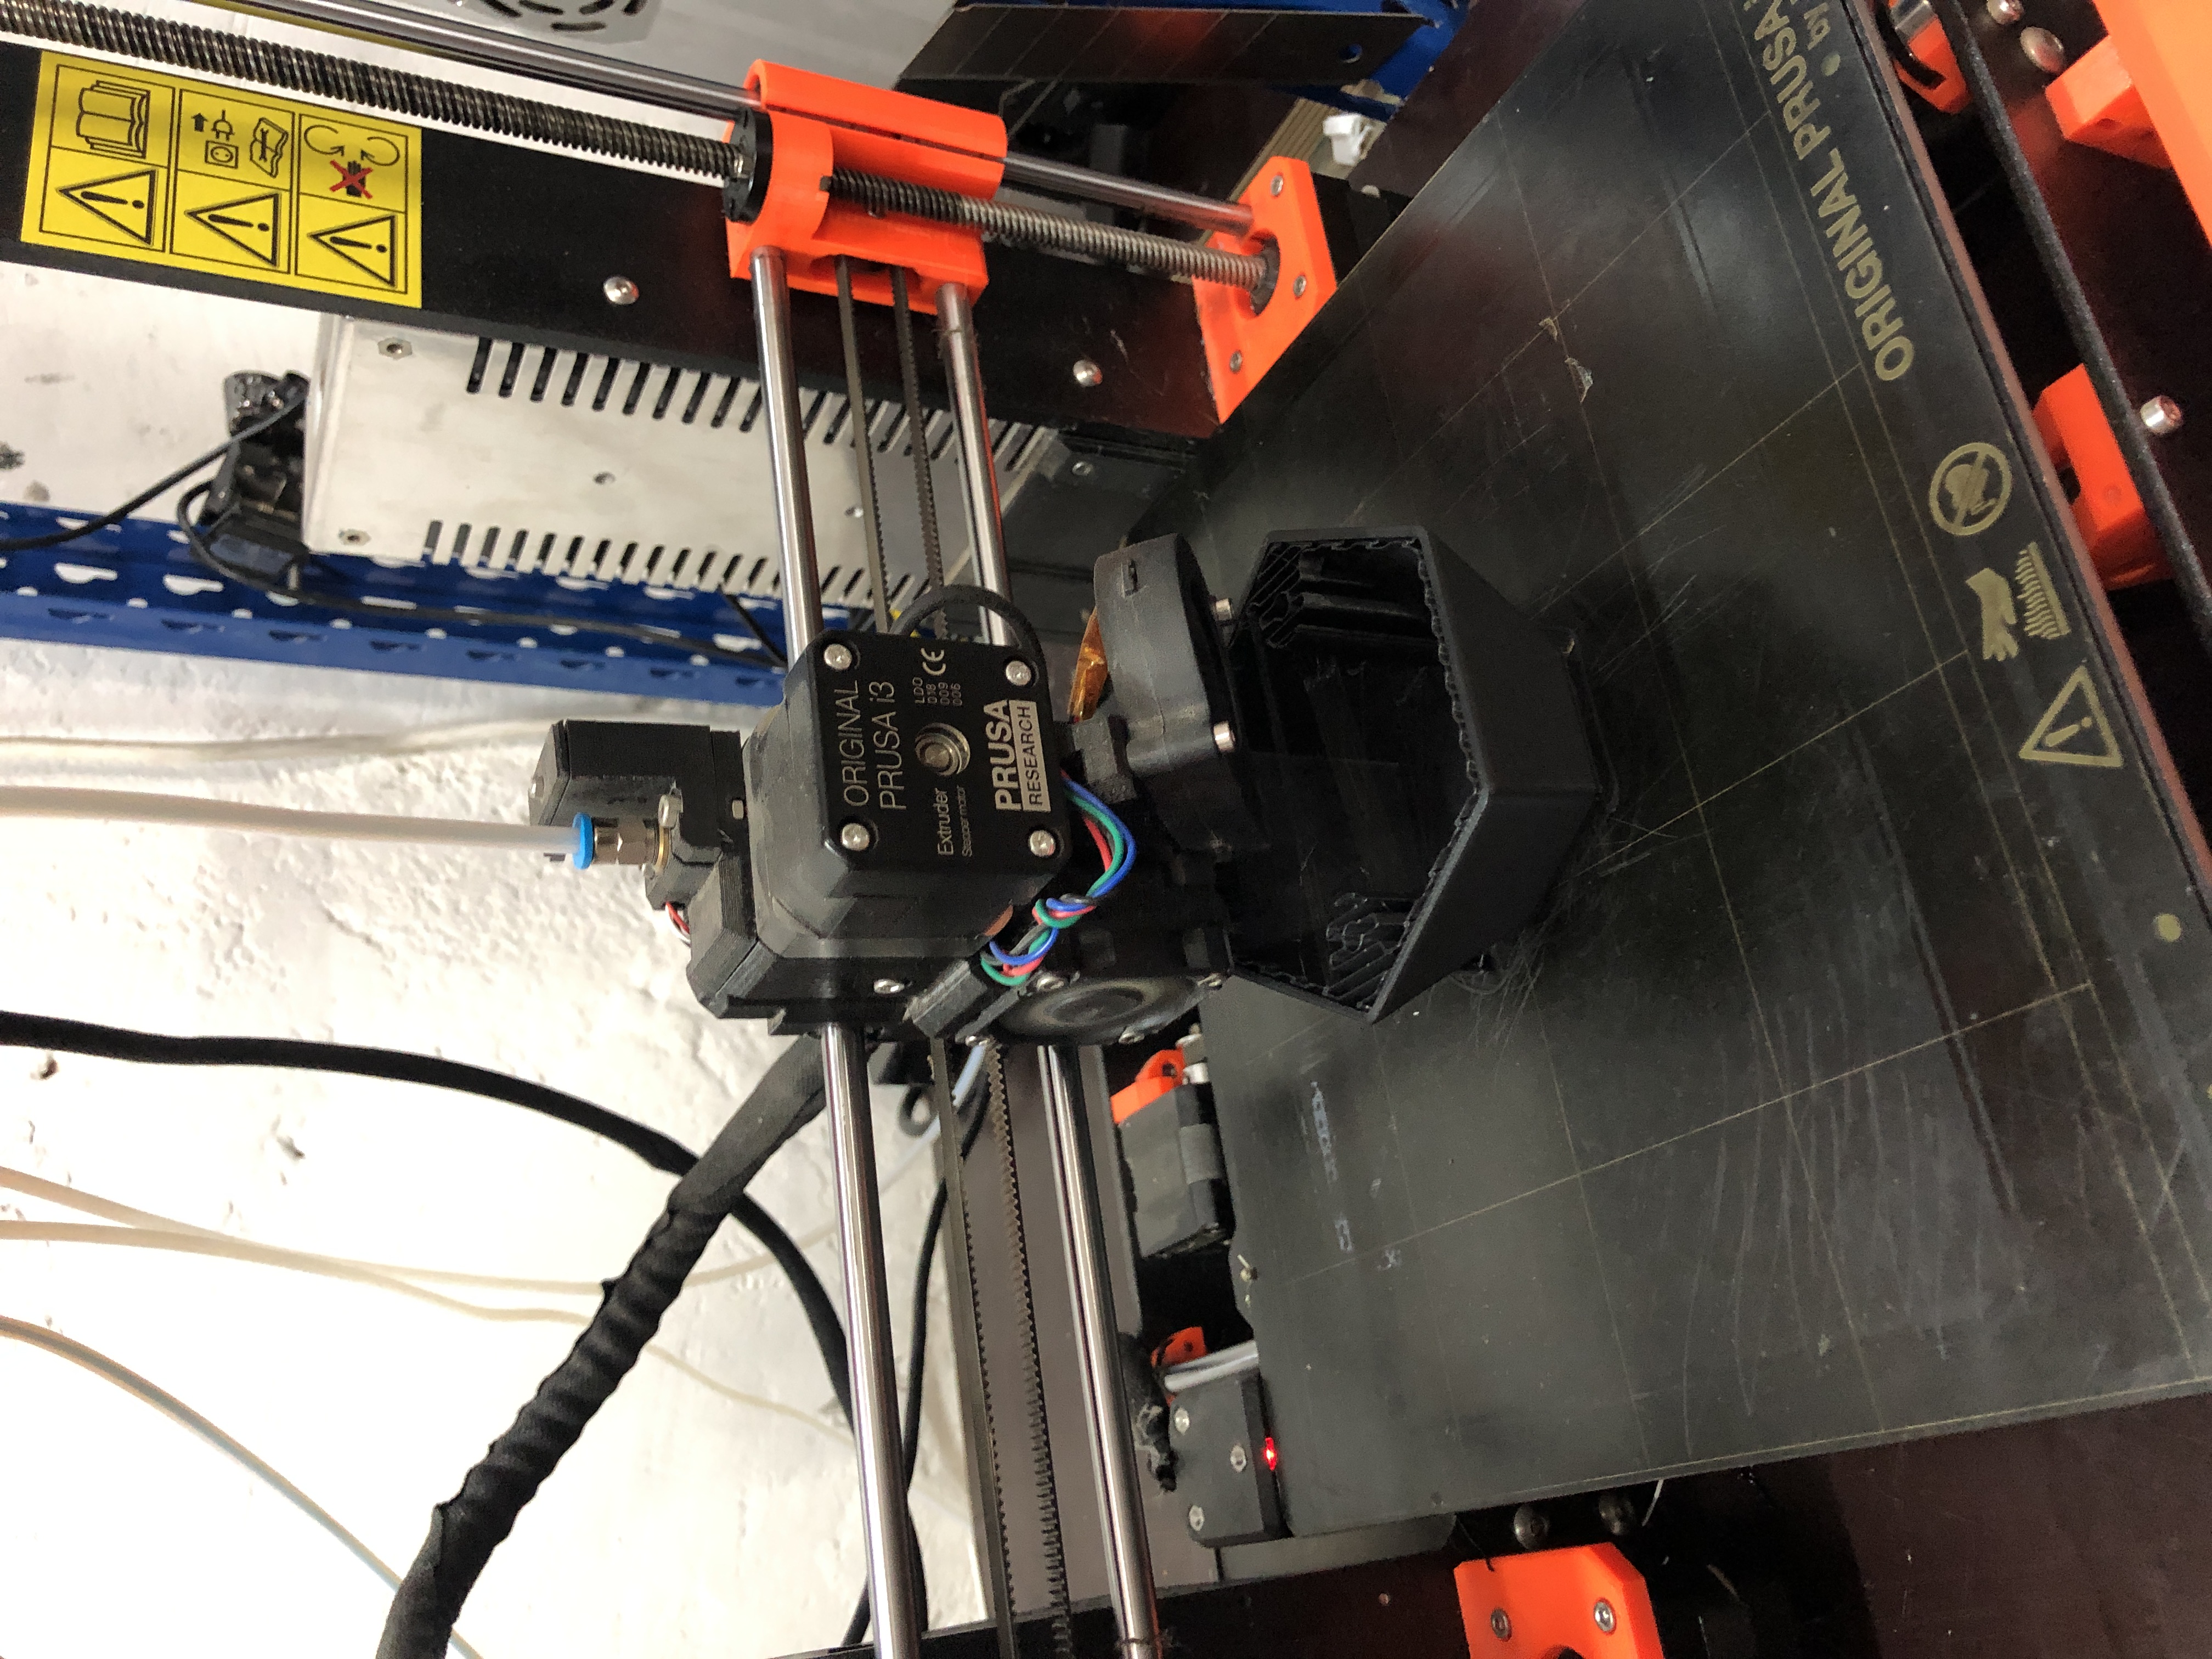
3D Fabrication
Then, he designed the final structure to be 3D printed in Fusion 360, with slight tweaks for each type of input (based on the shape of the button/knob).
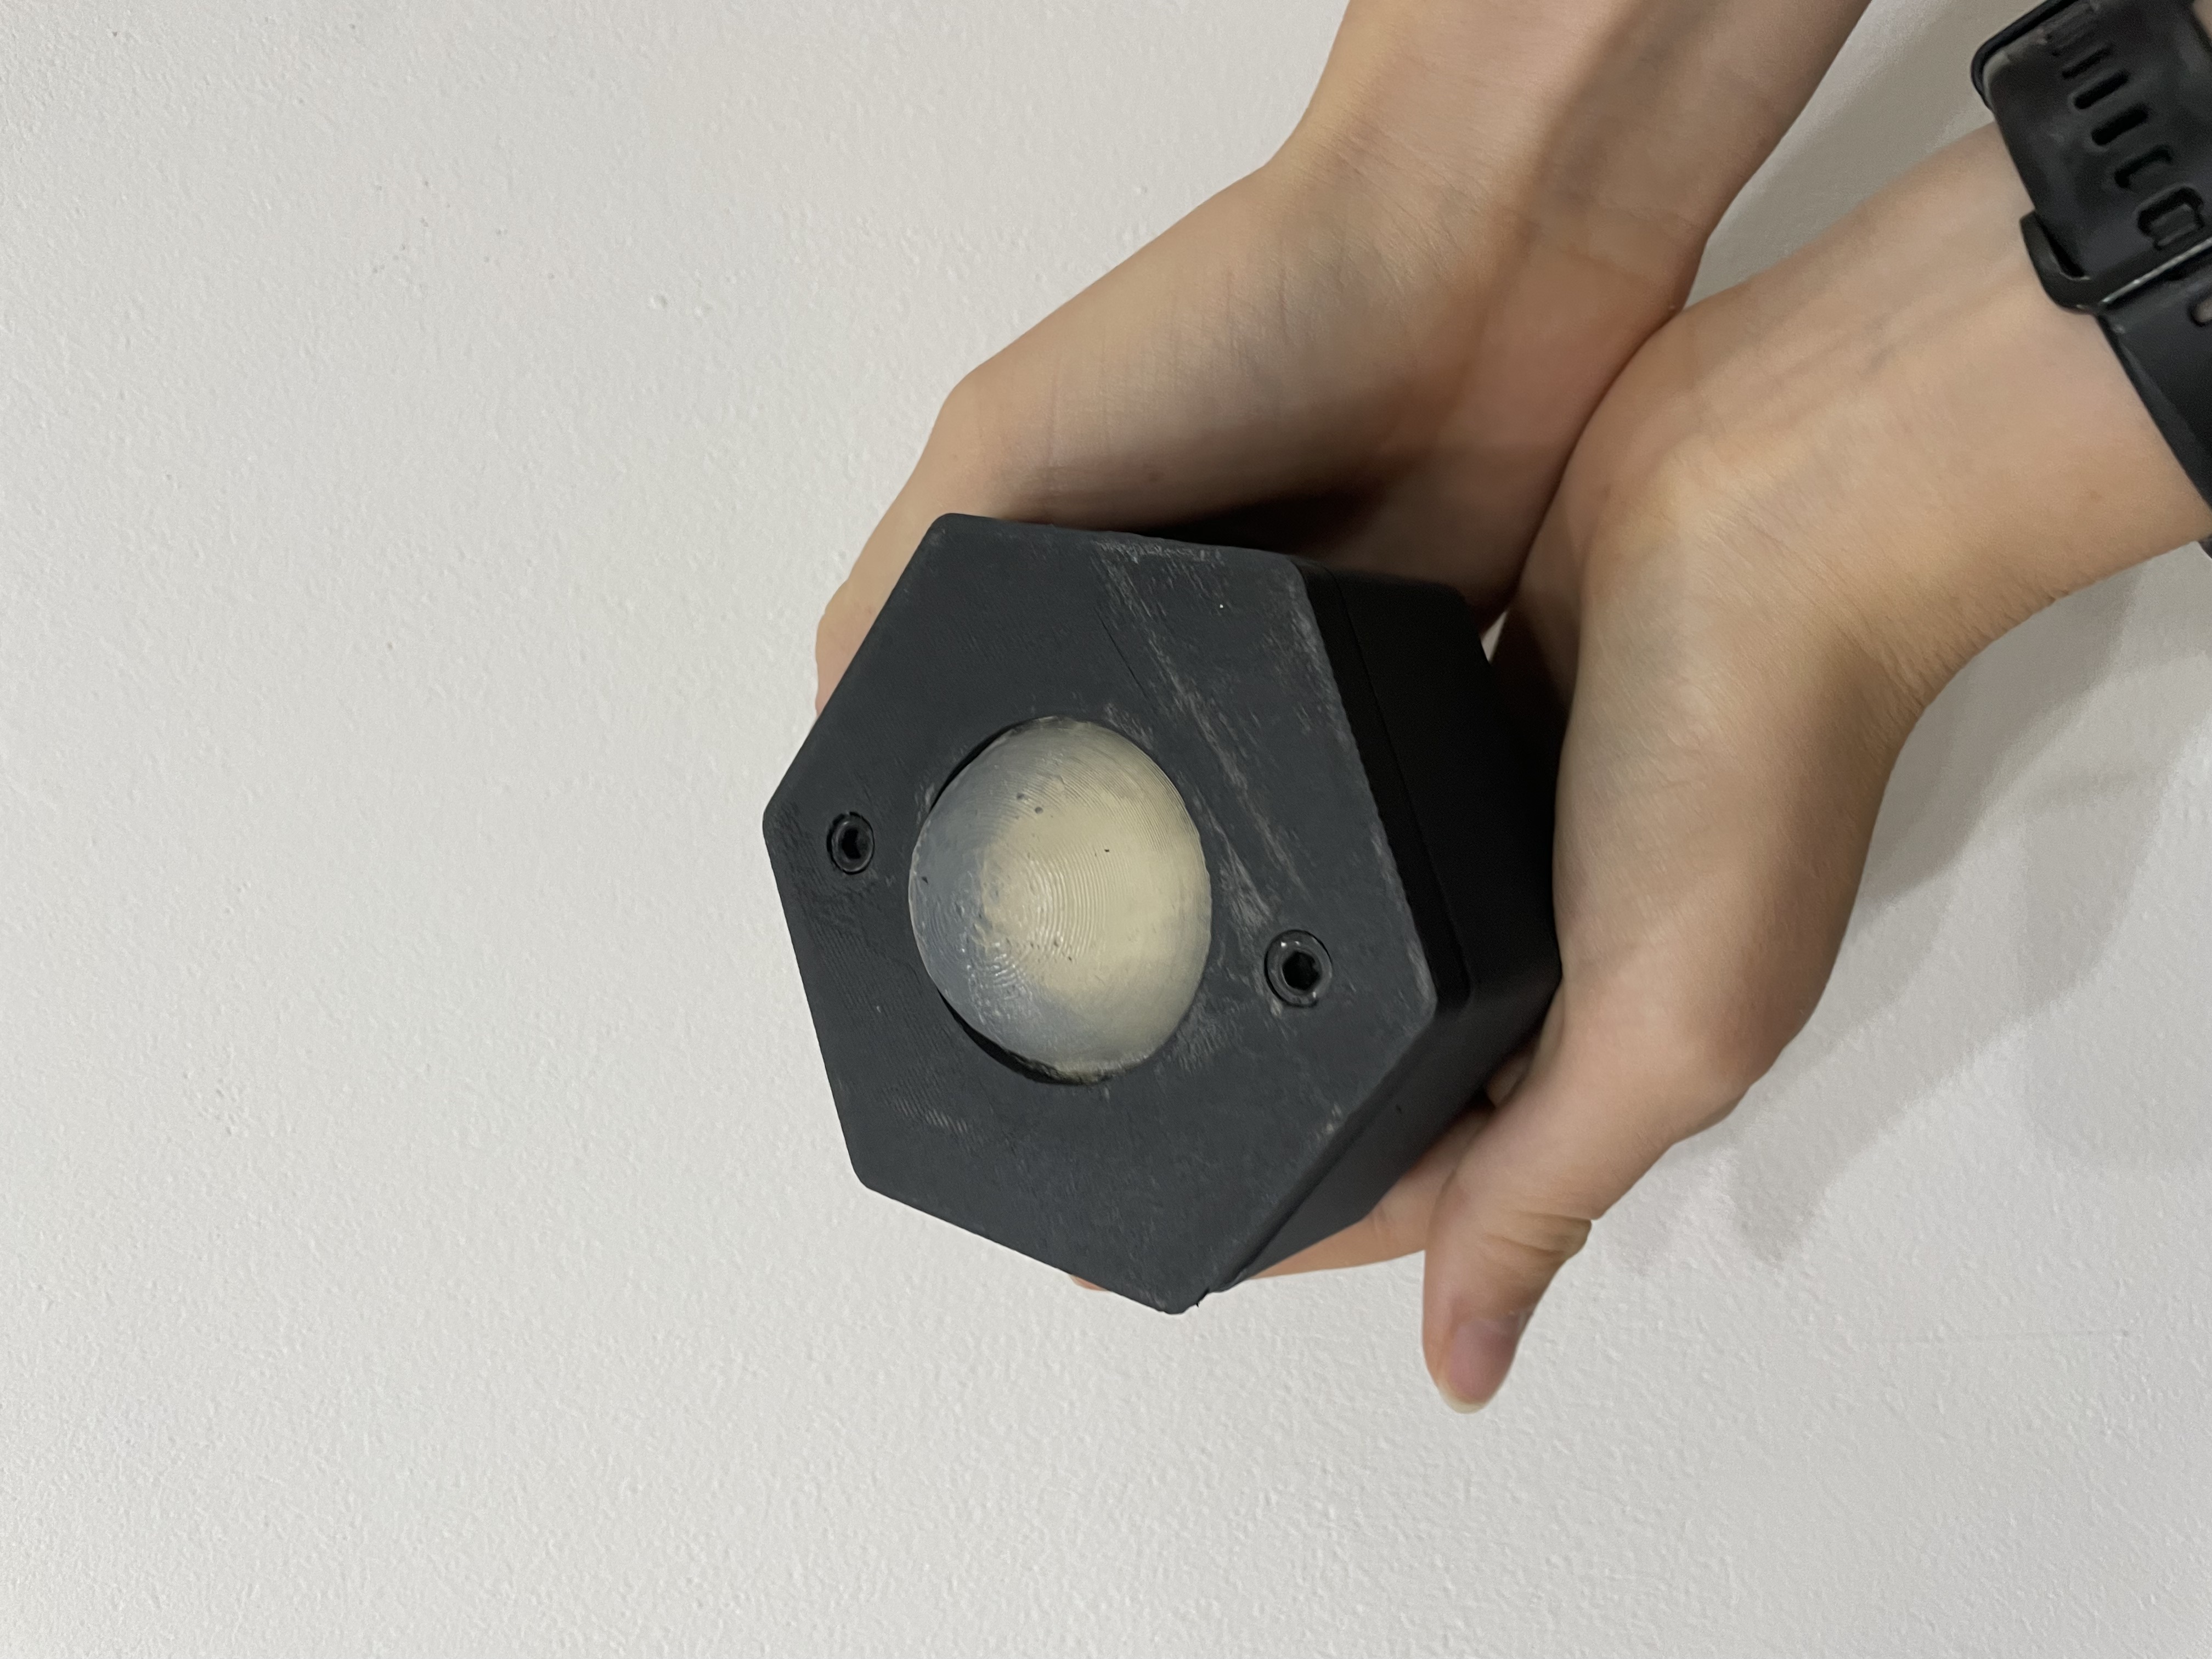
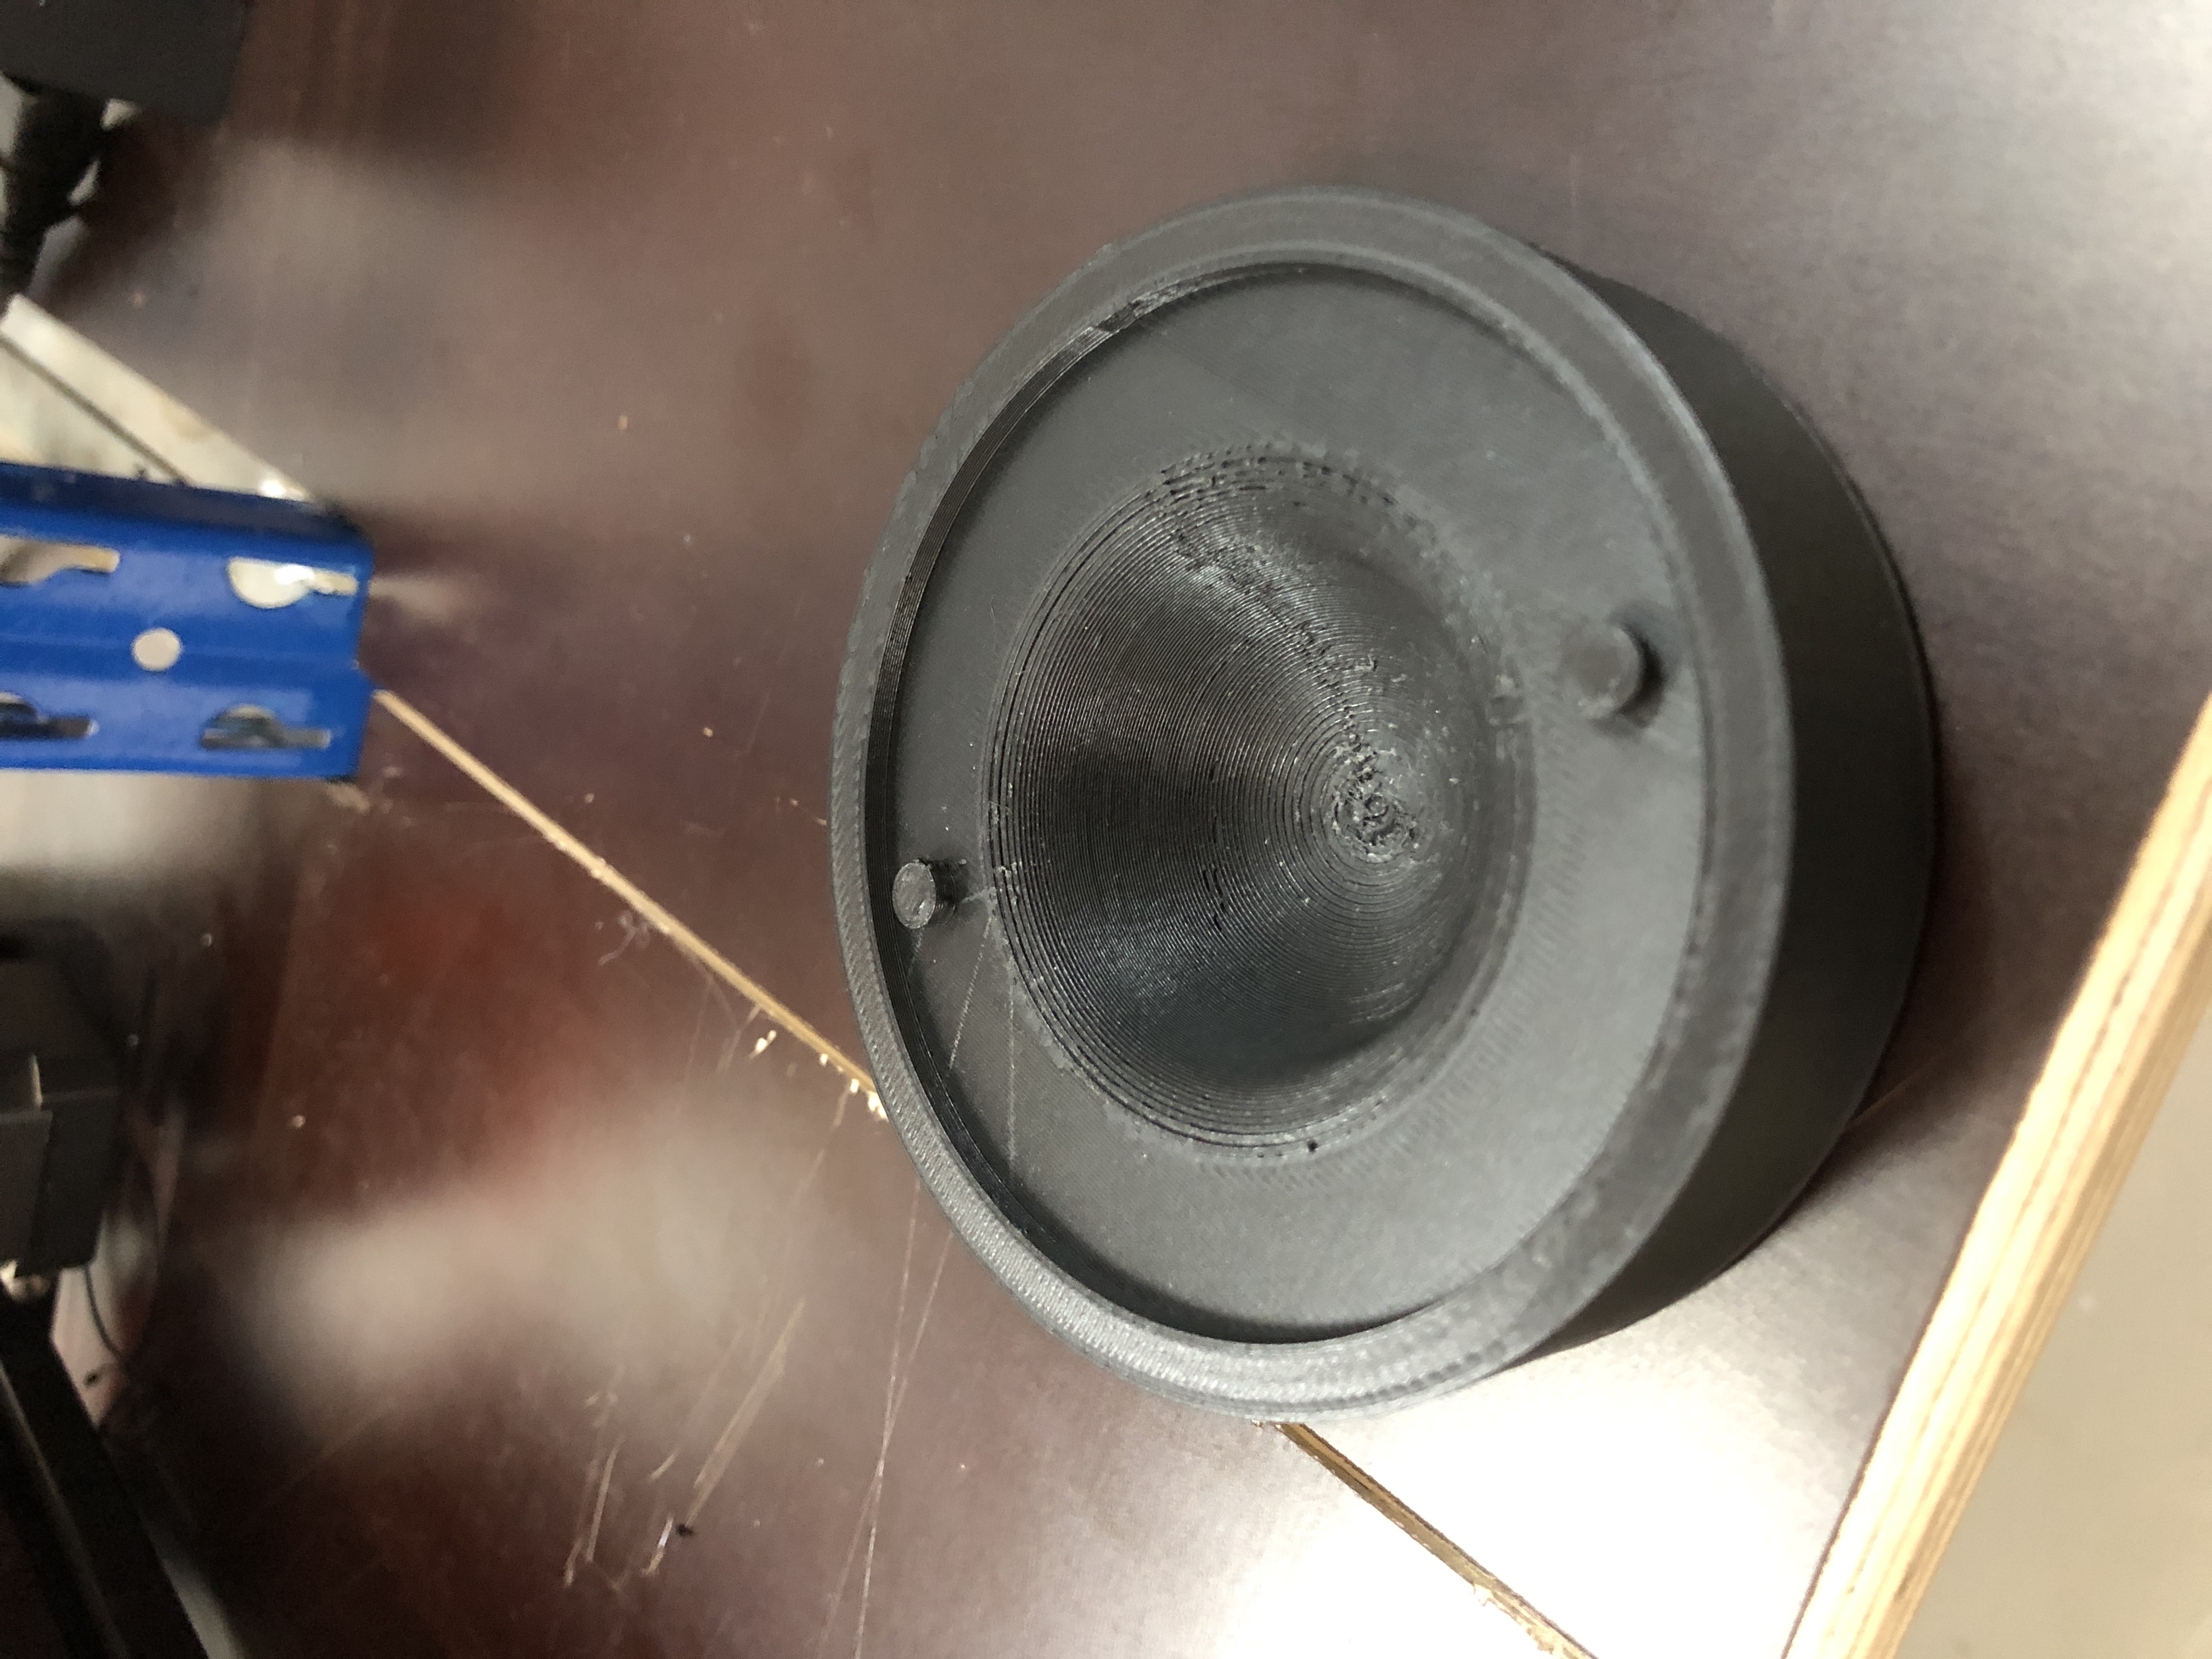
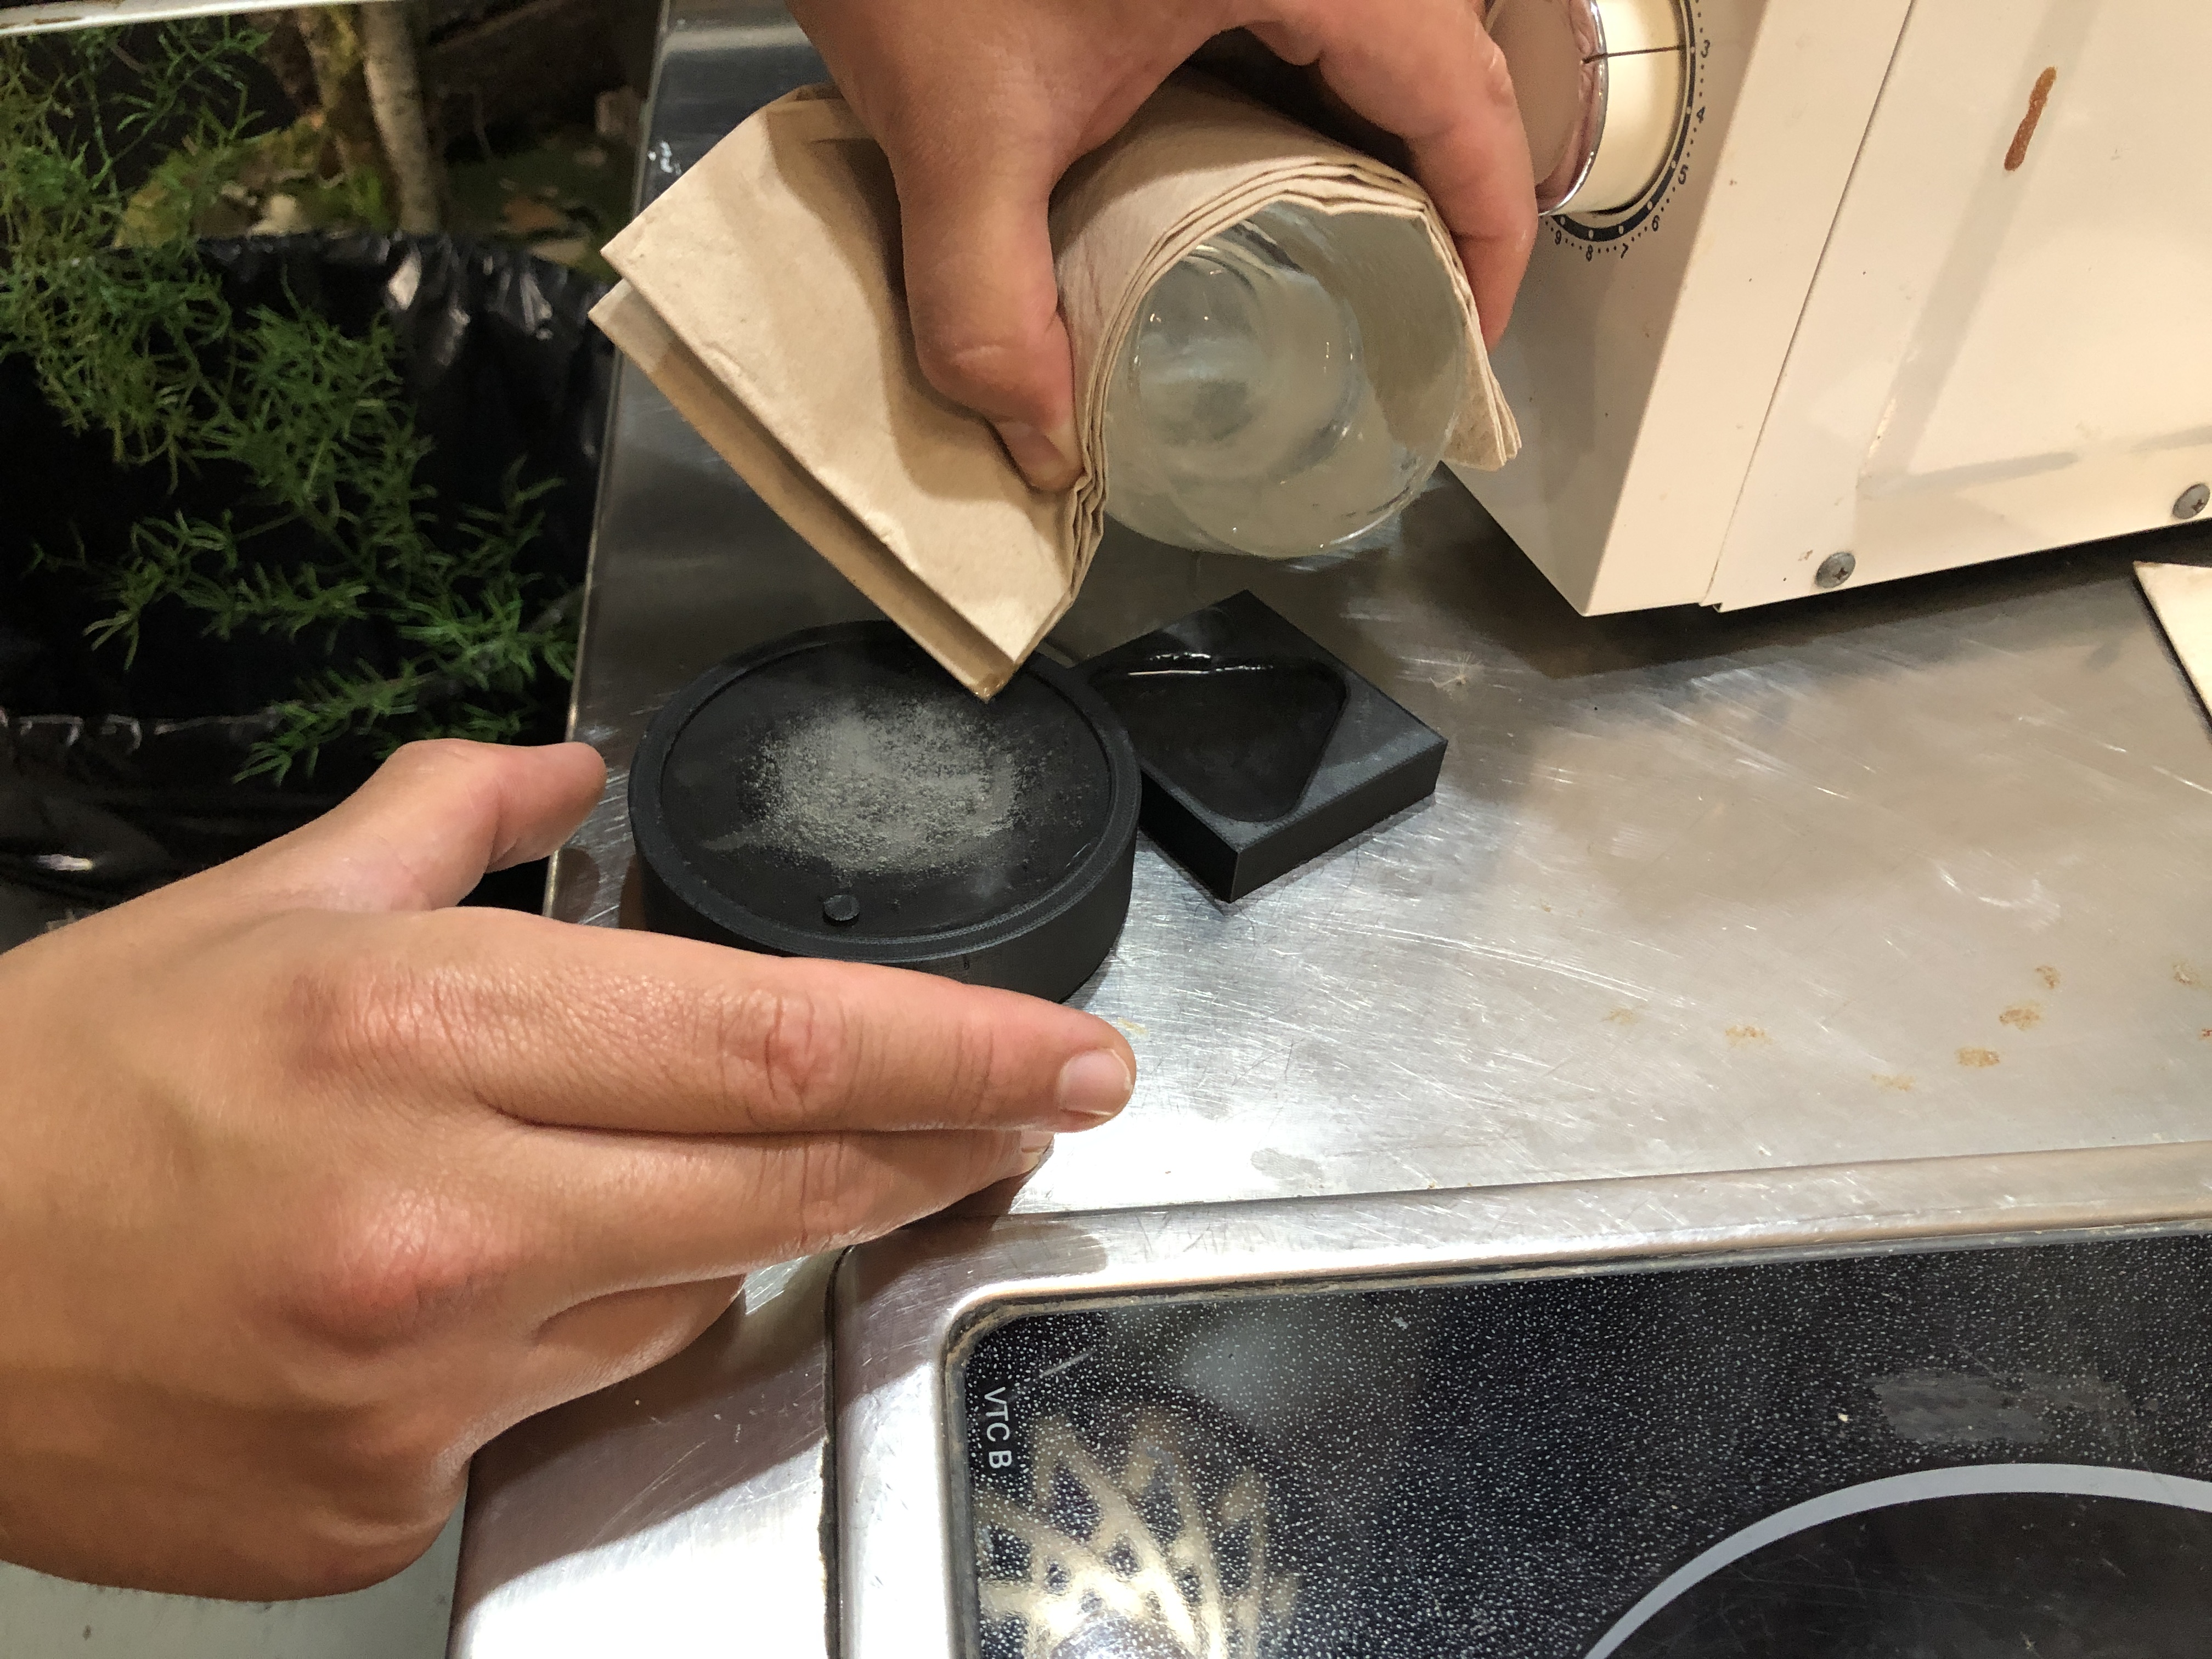
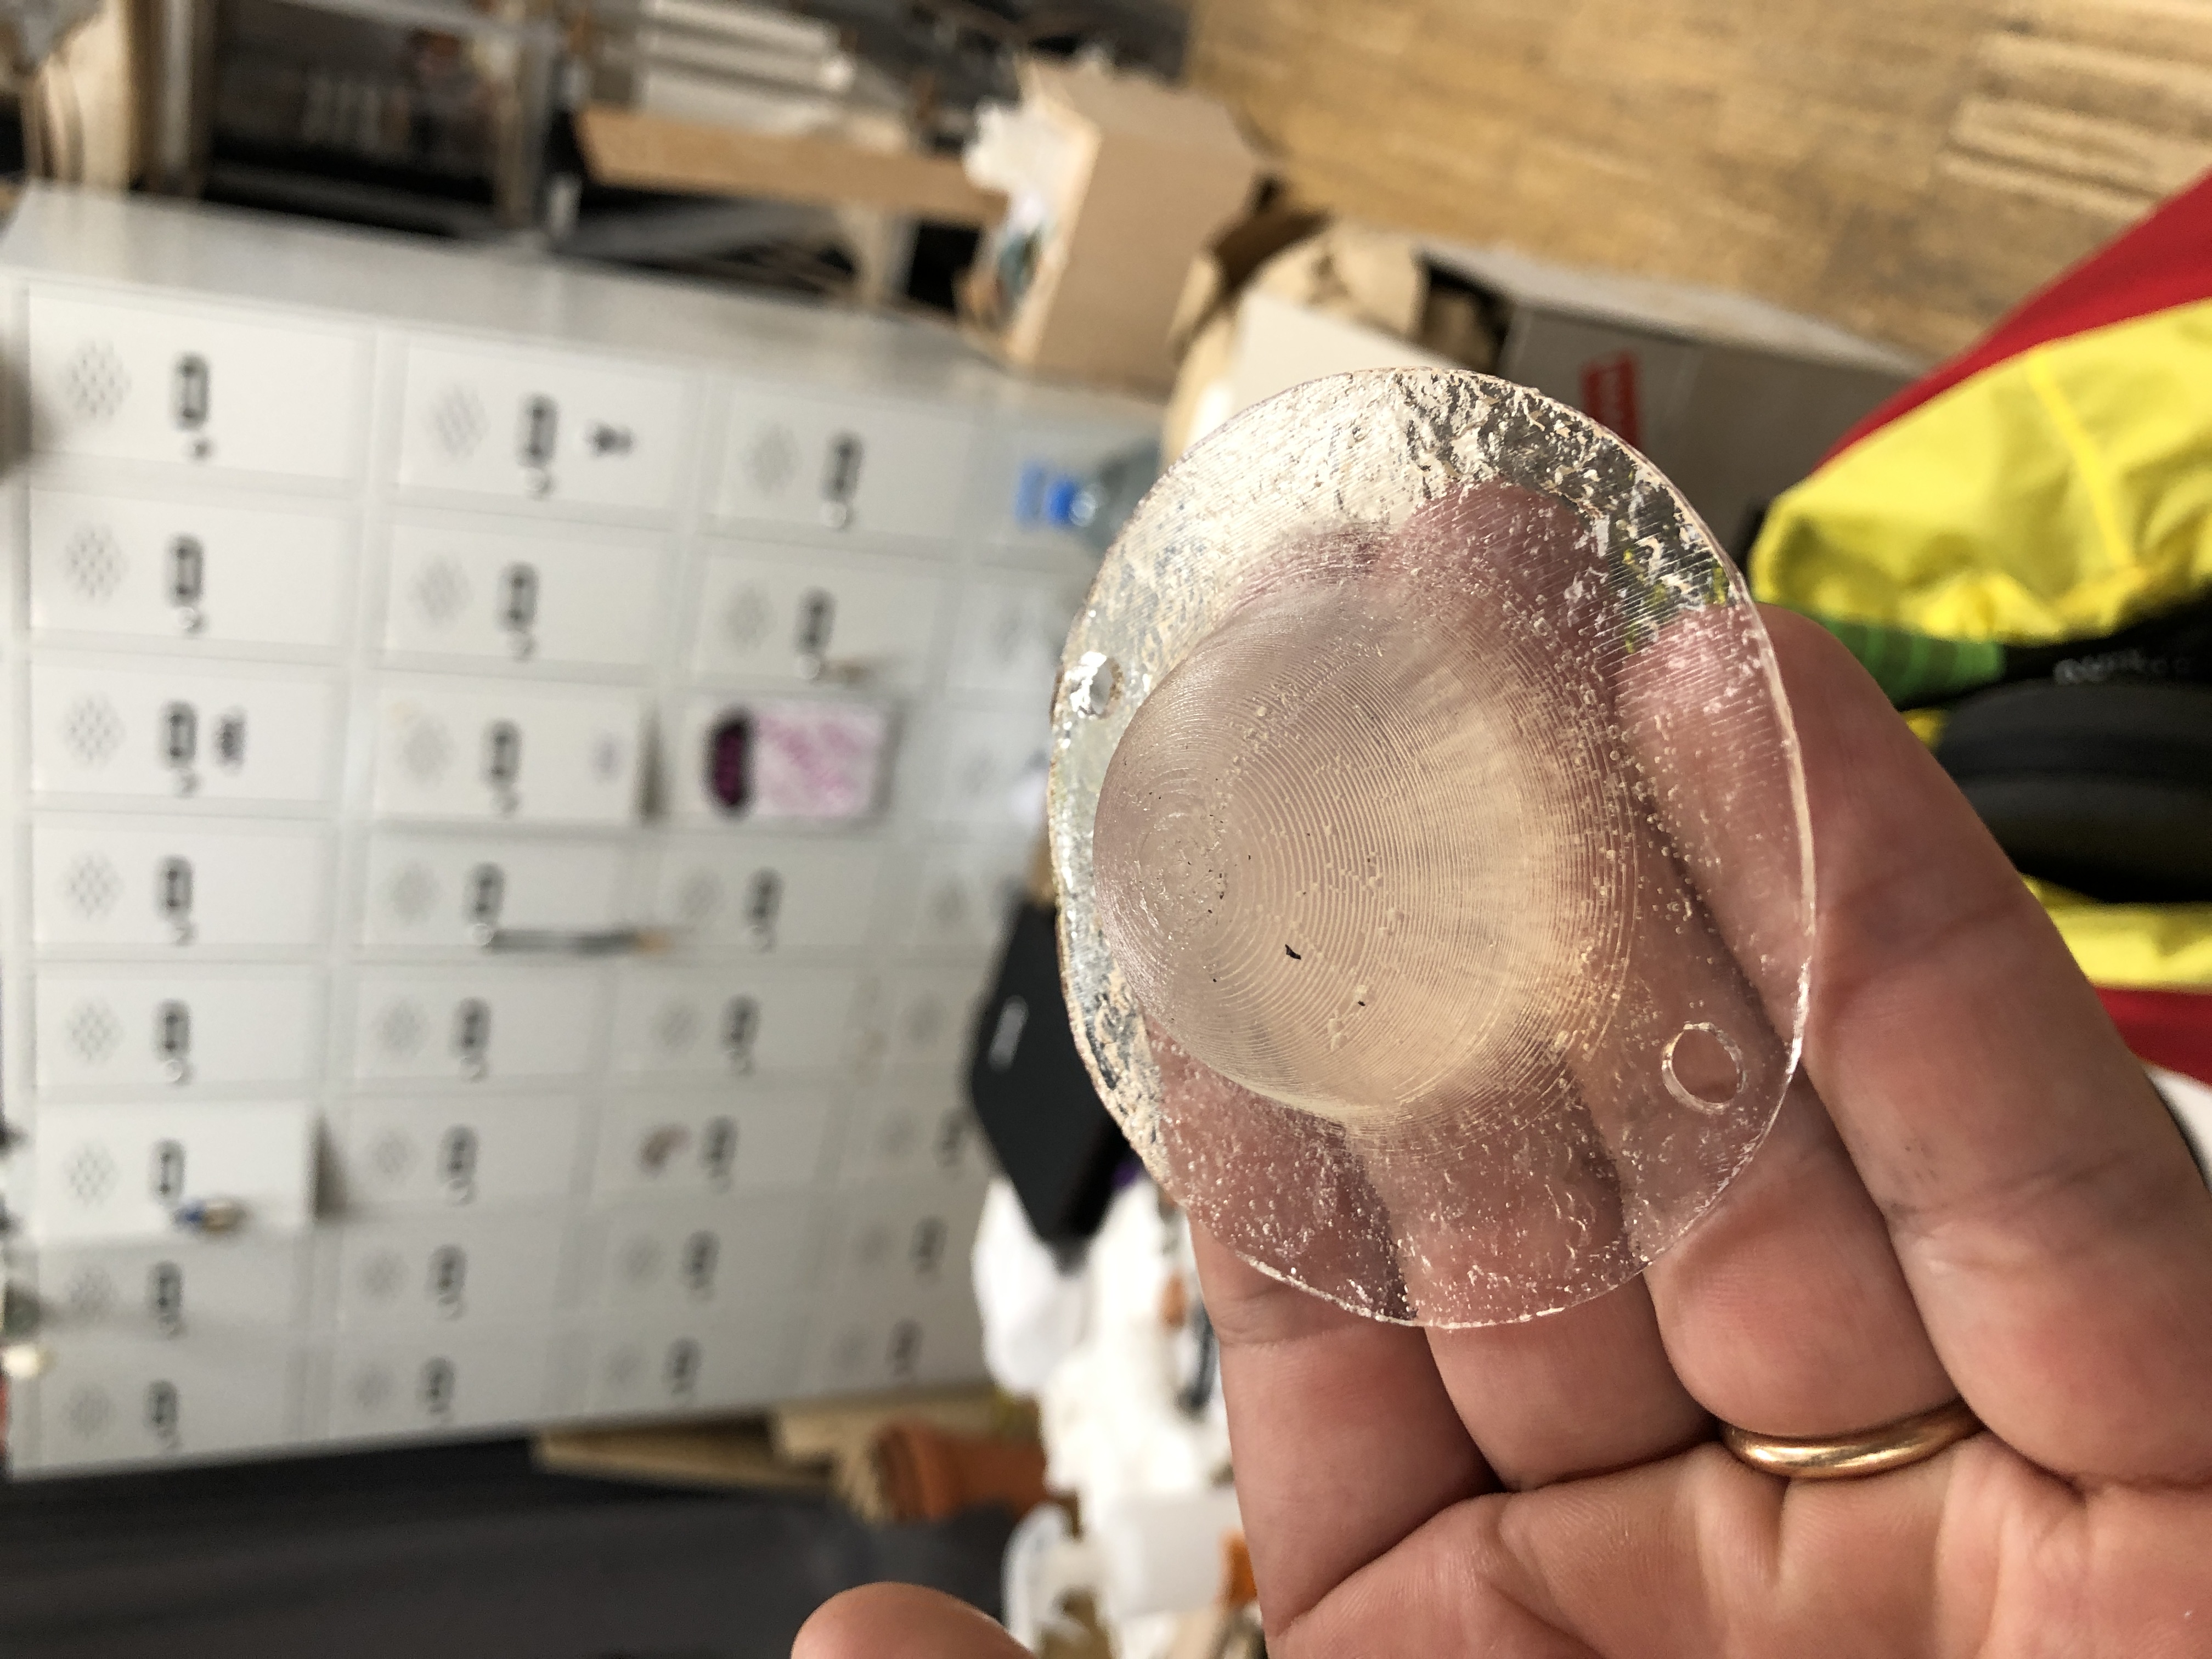
Molding & Casting
Recipe for biomaterials can be found here.
Juaco also designed the mould for the biomaterials, so that it could fit perfectly into the case.
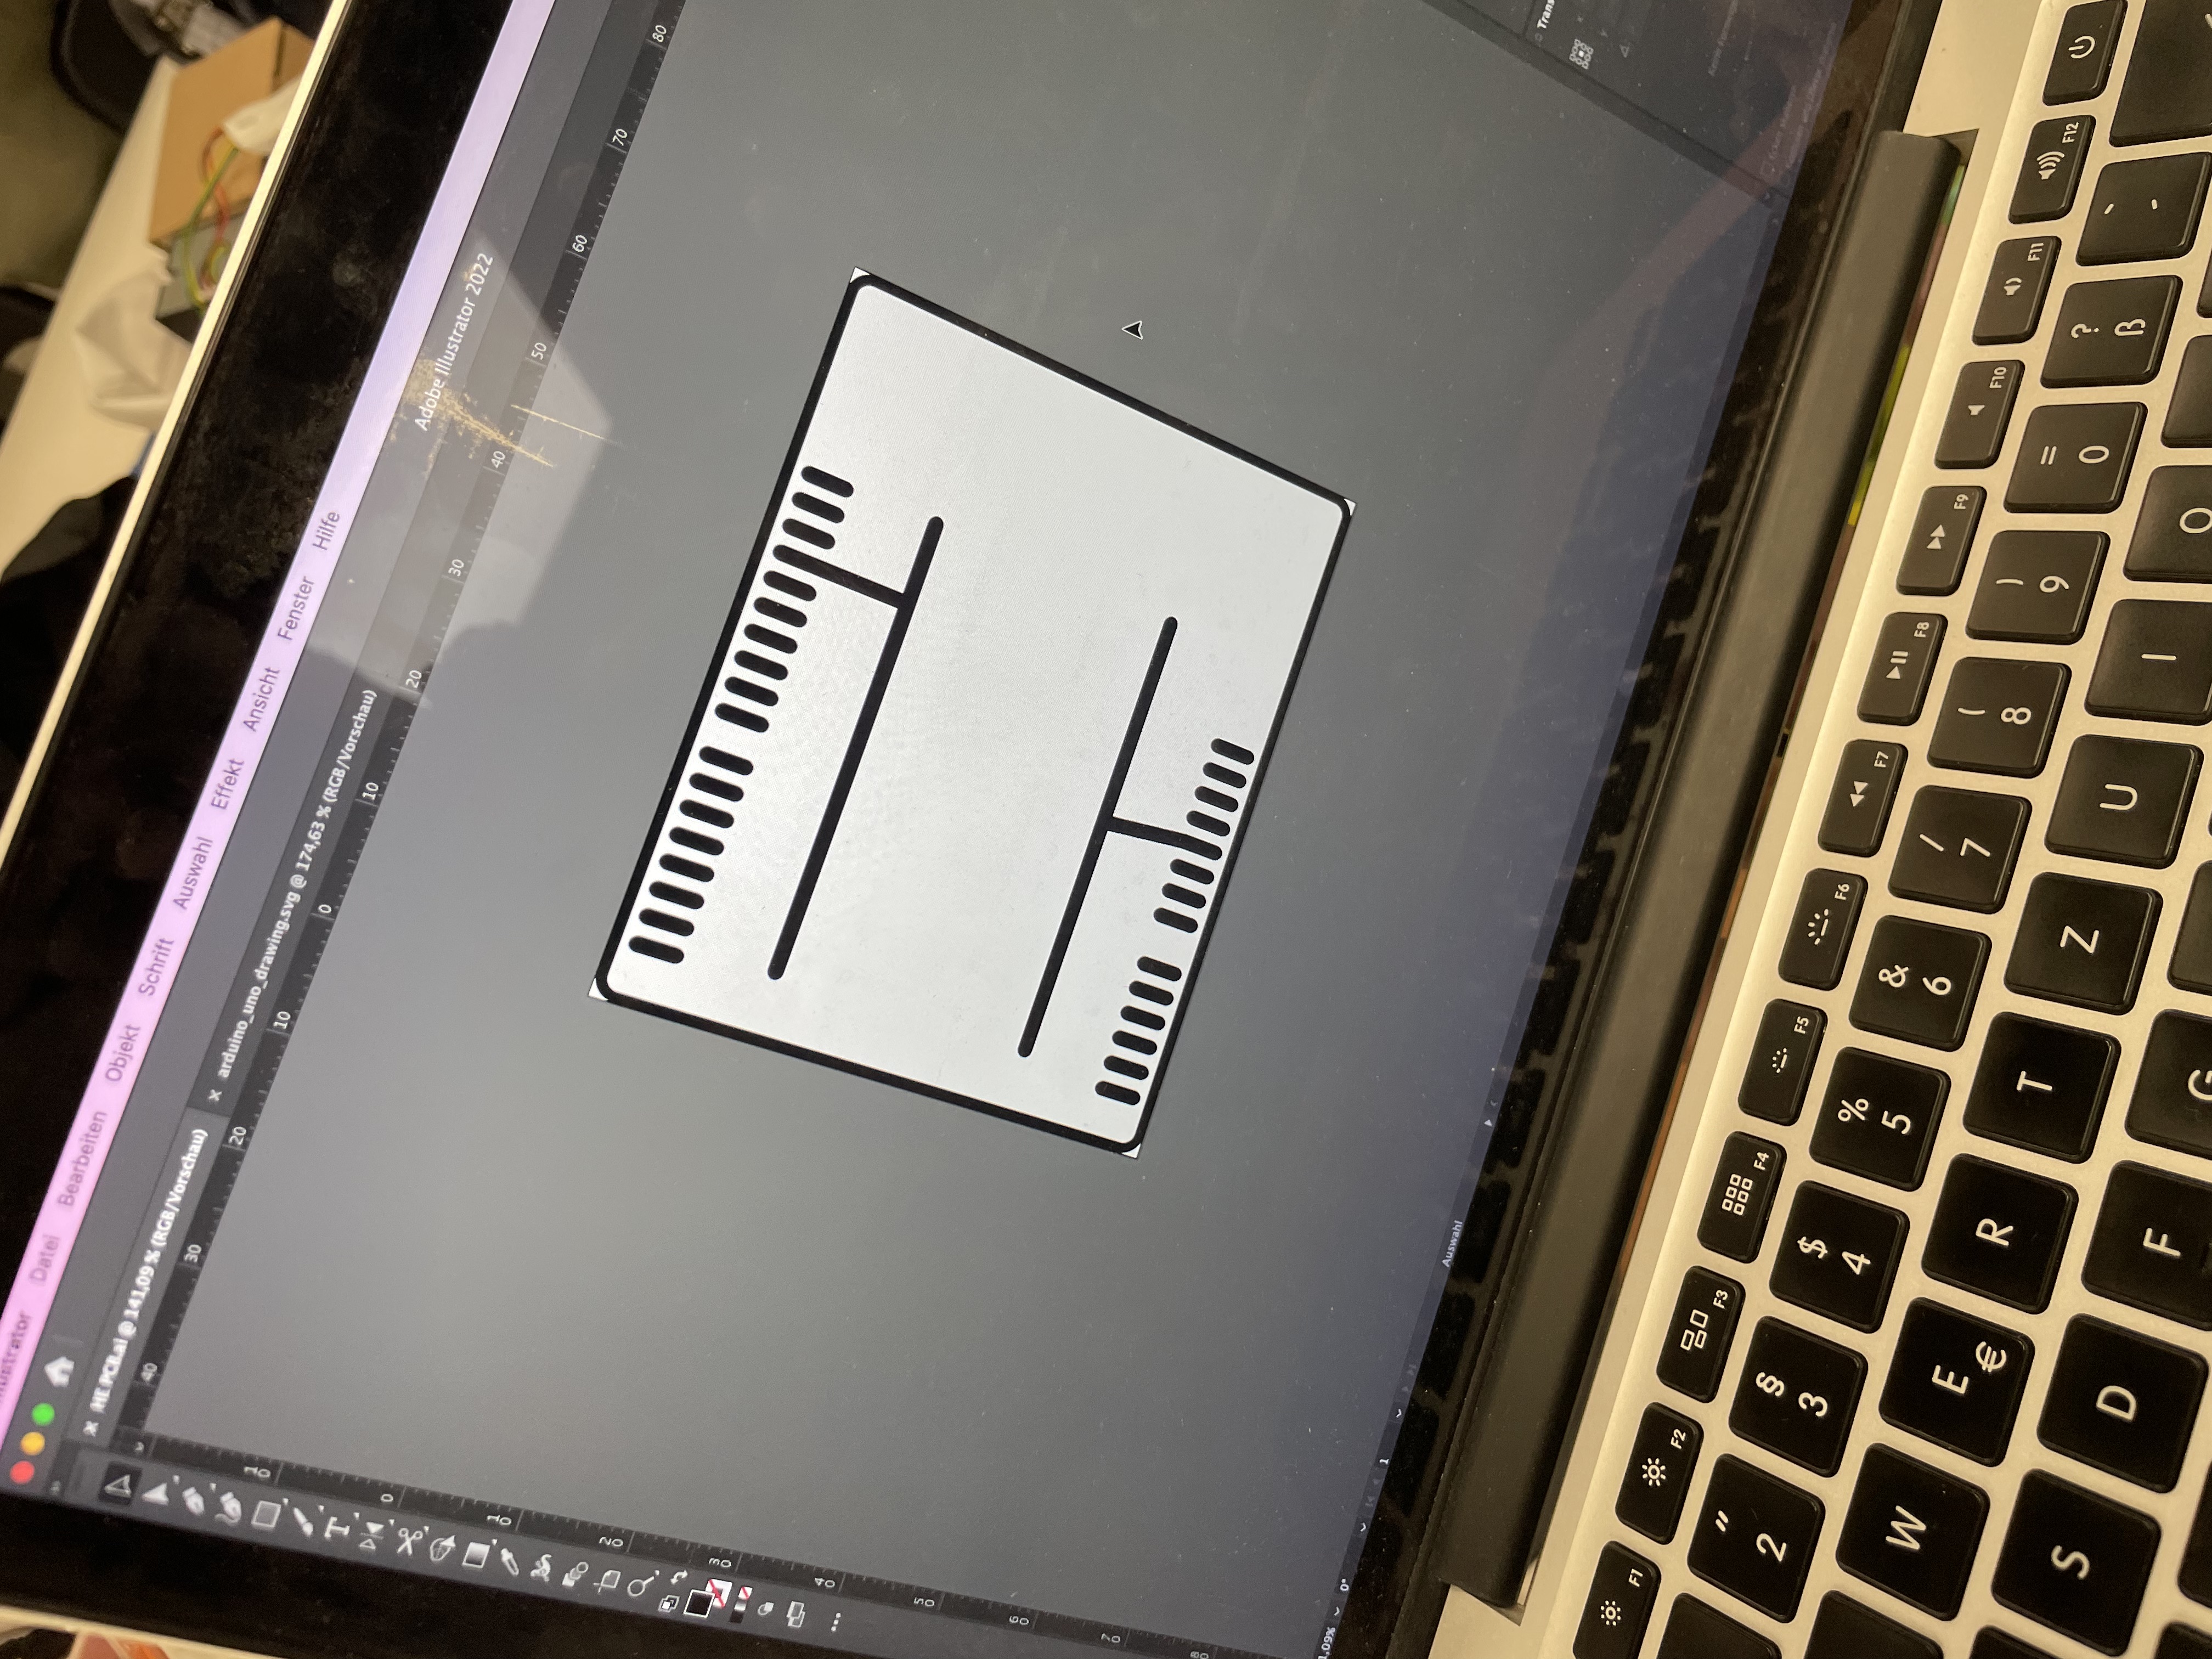
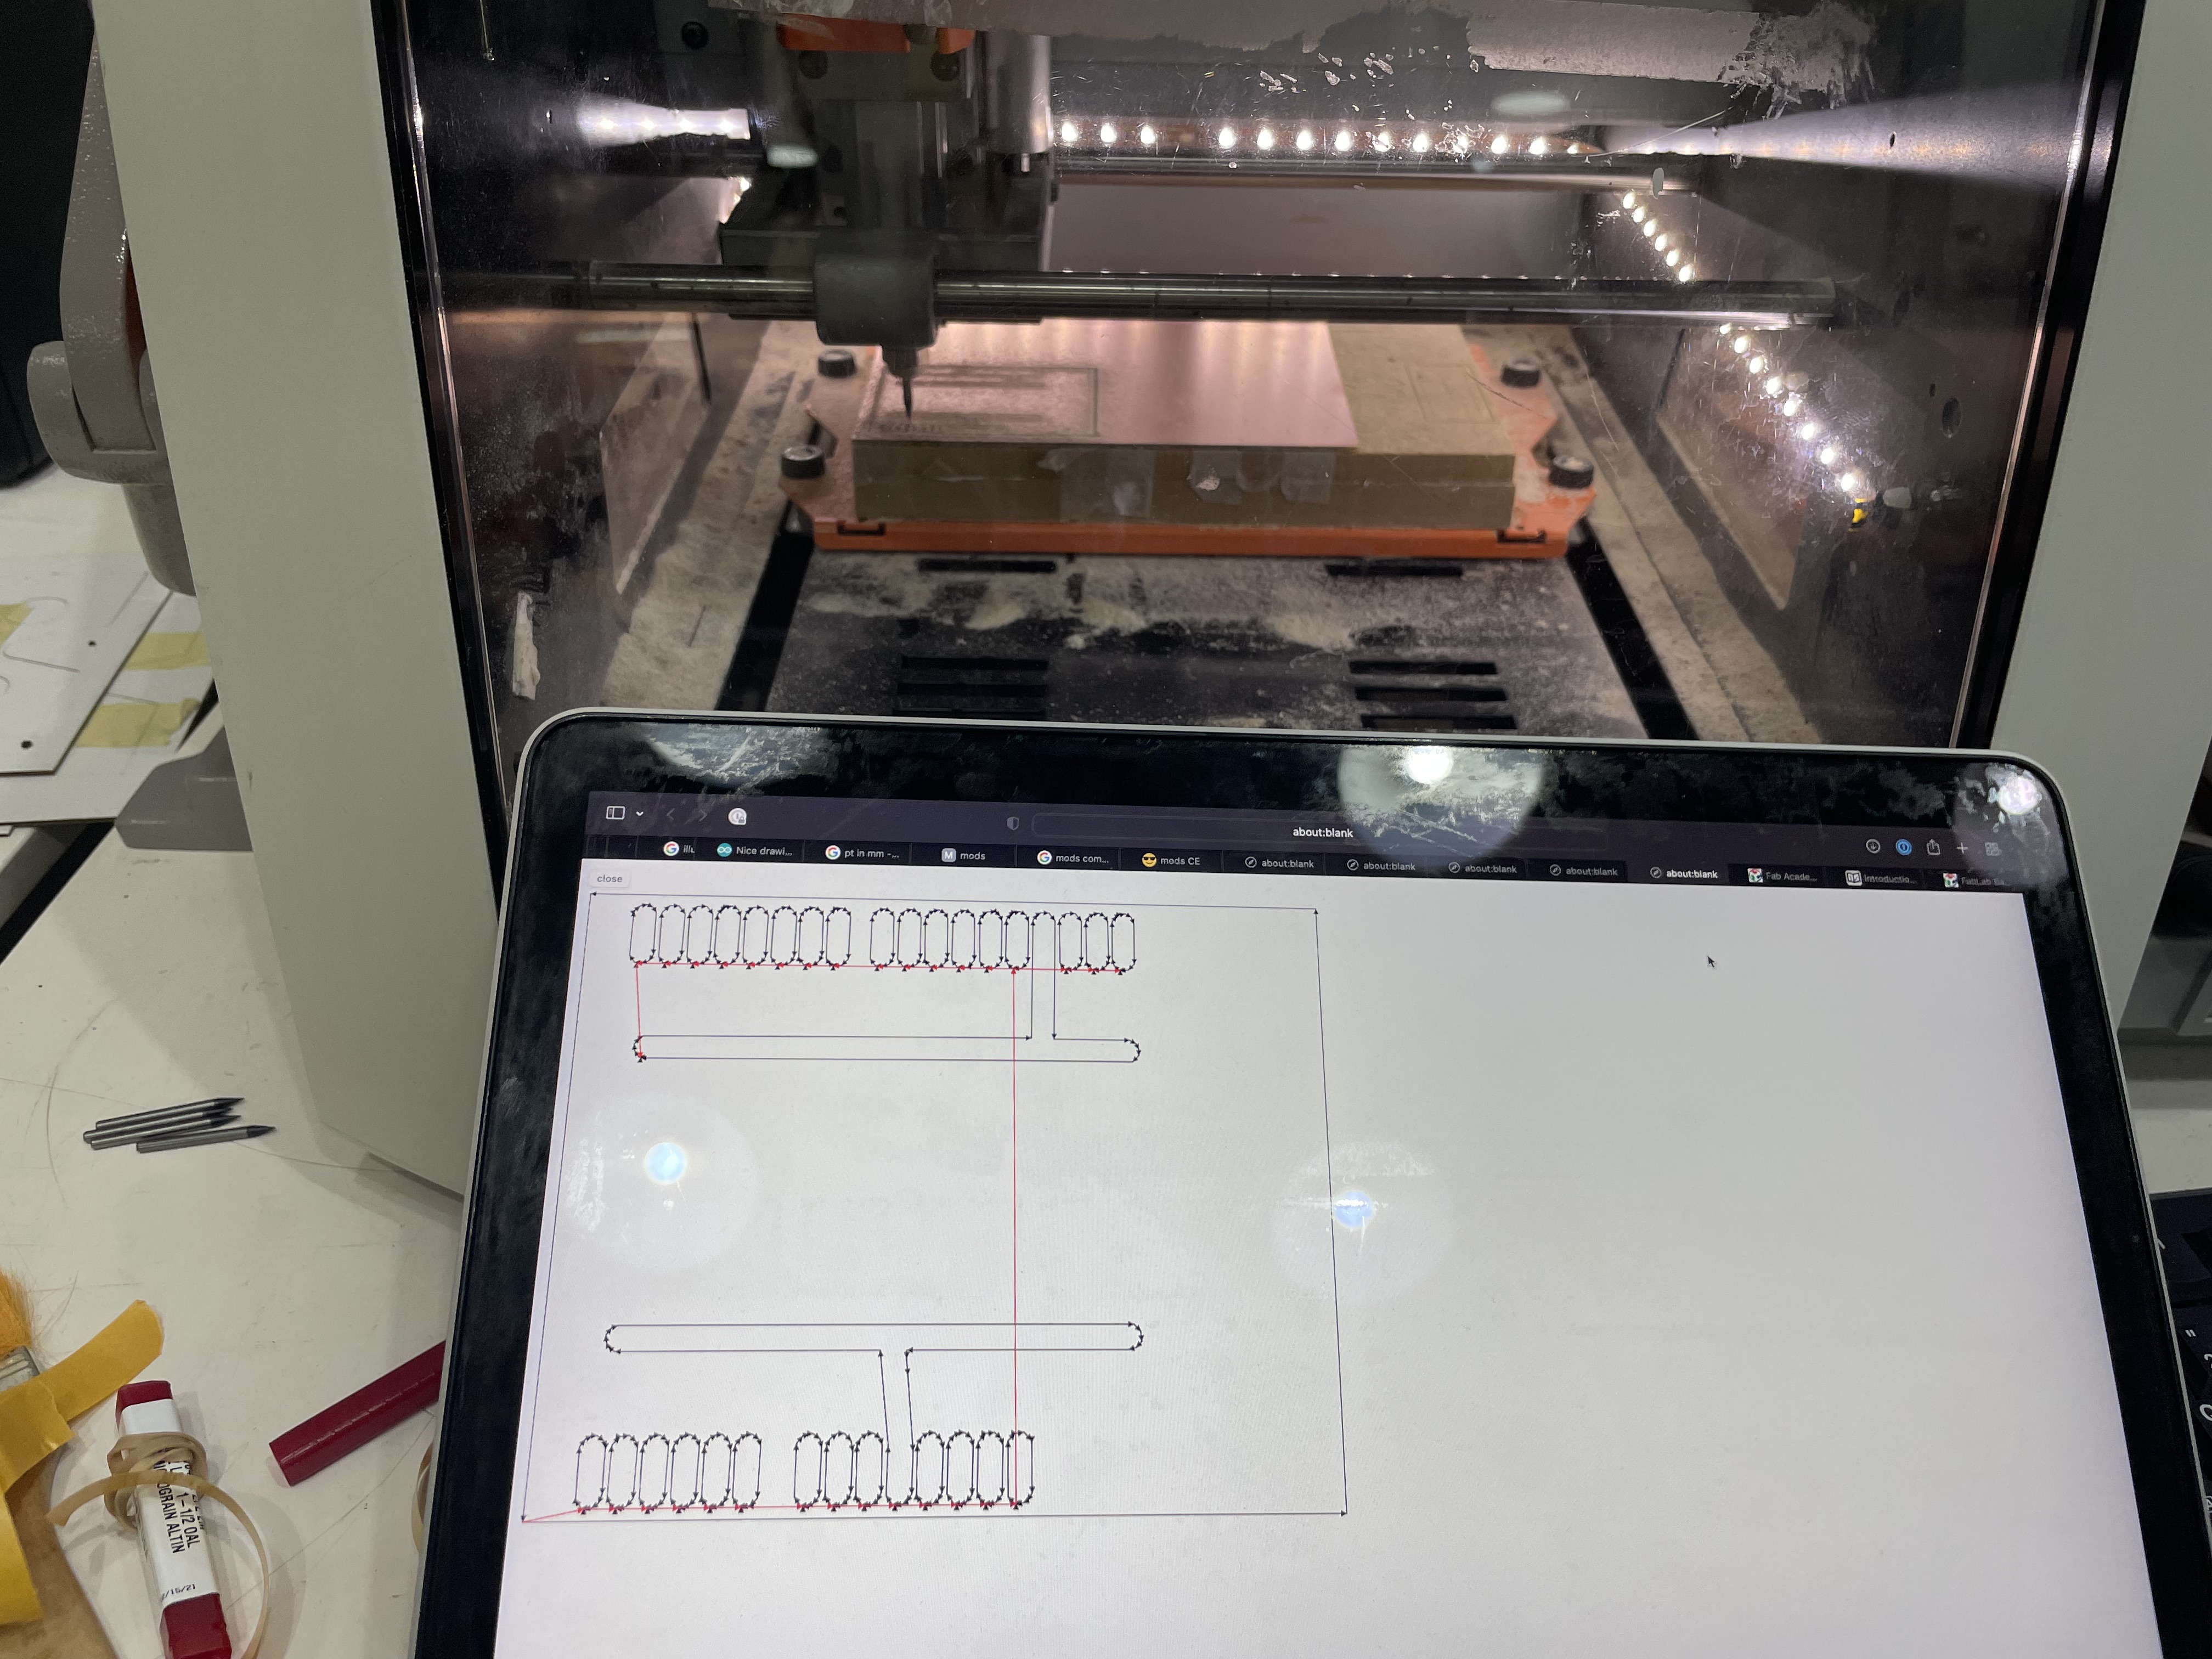
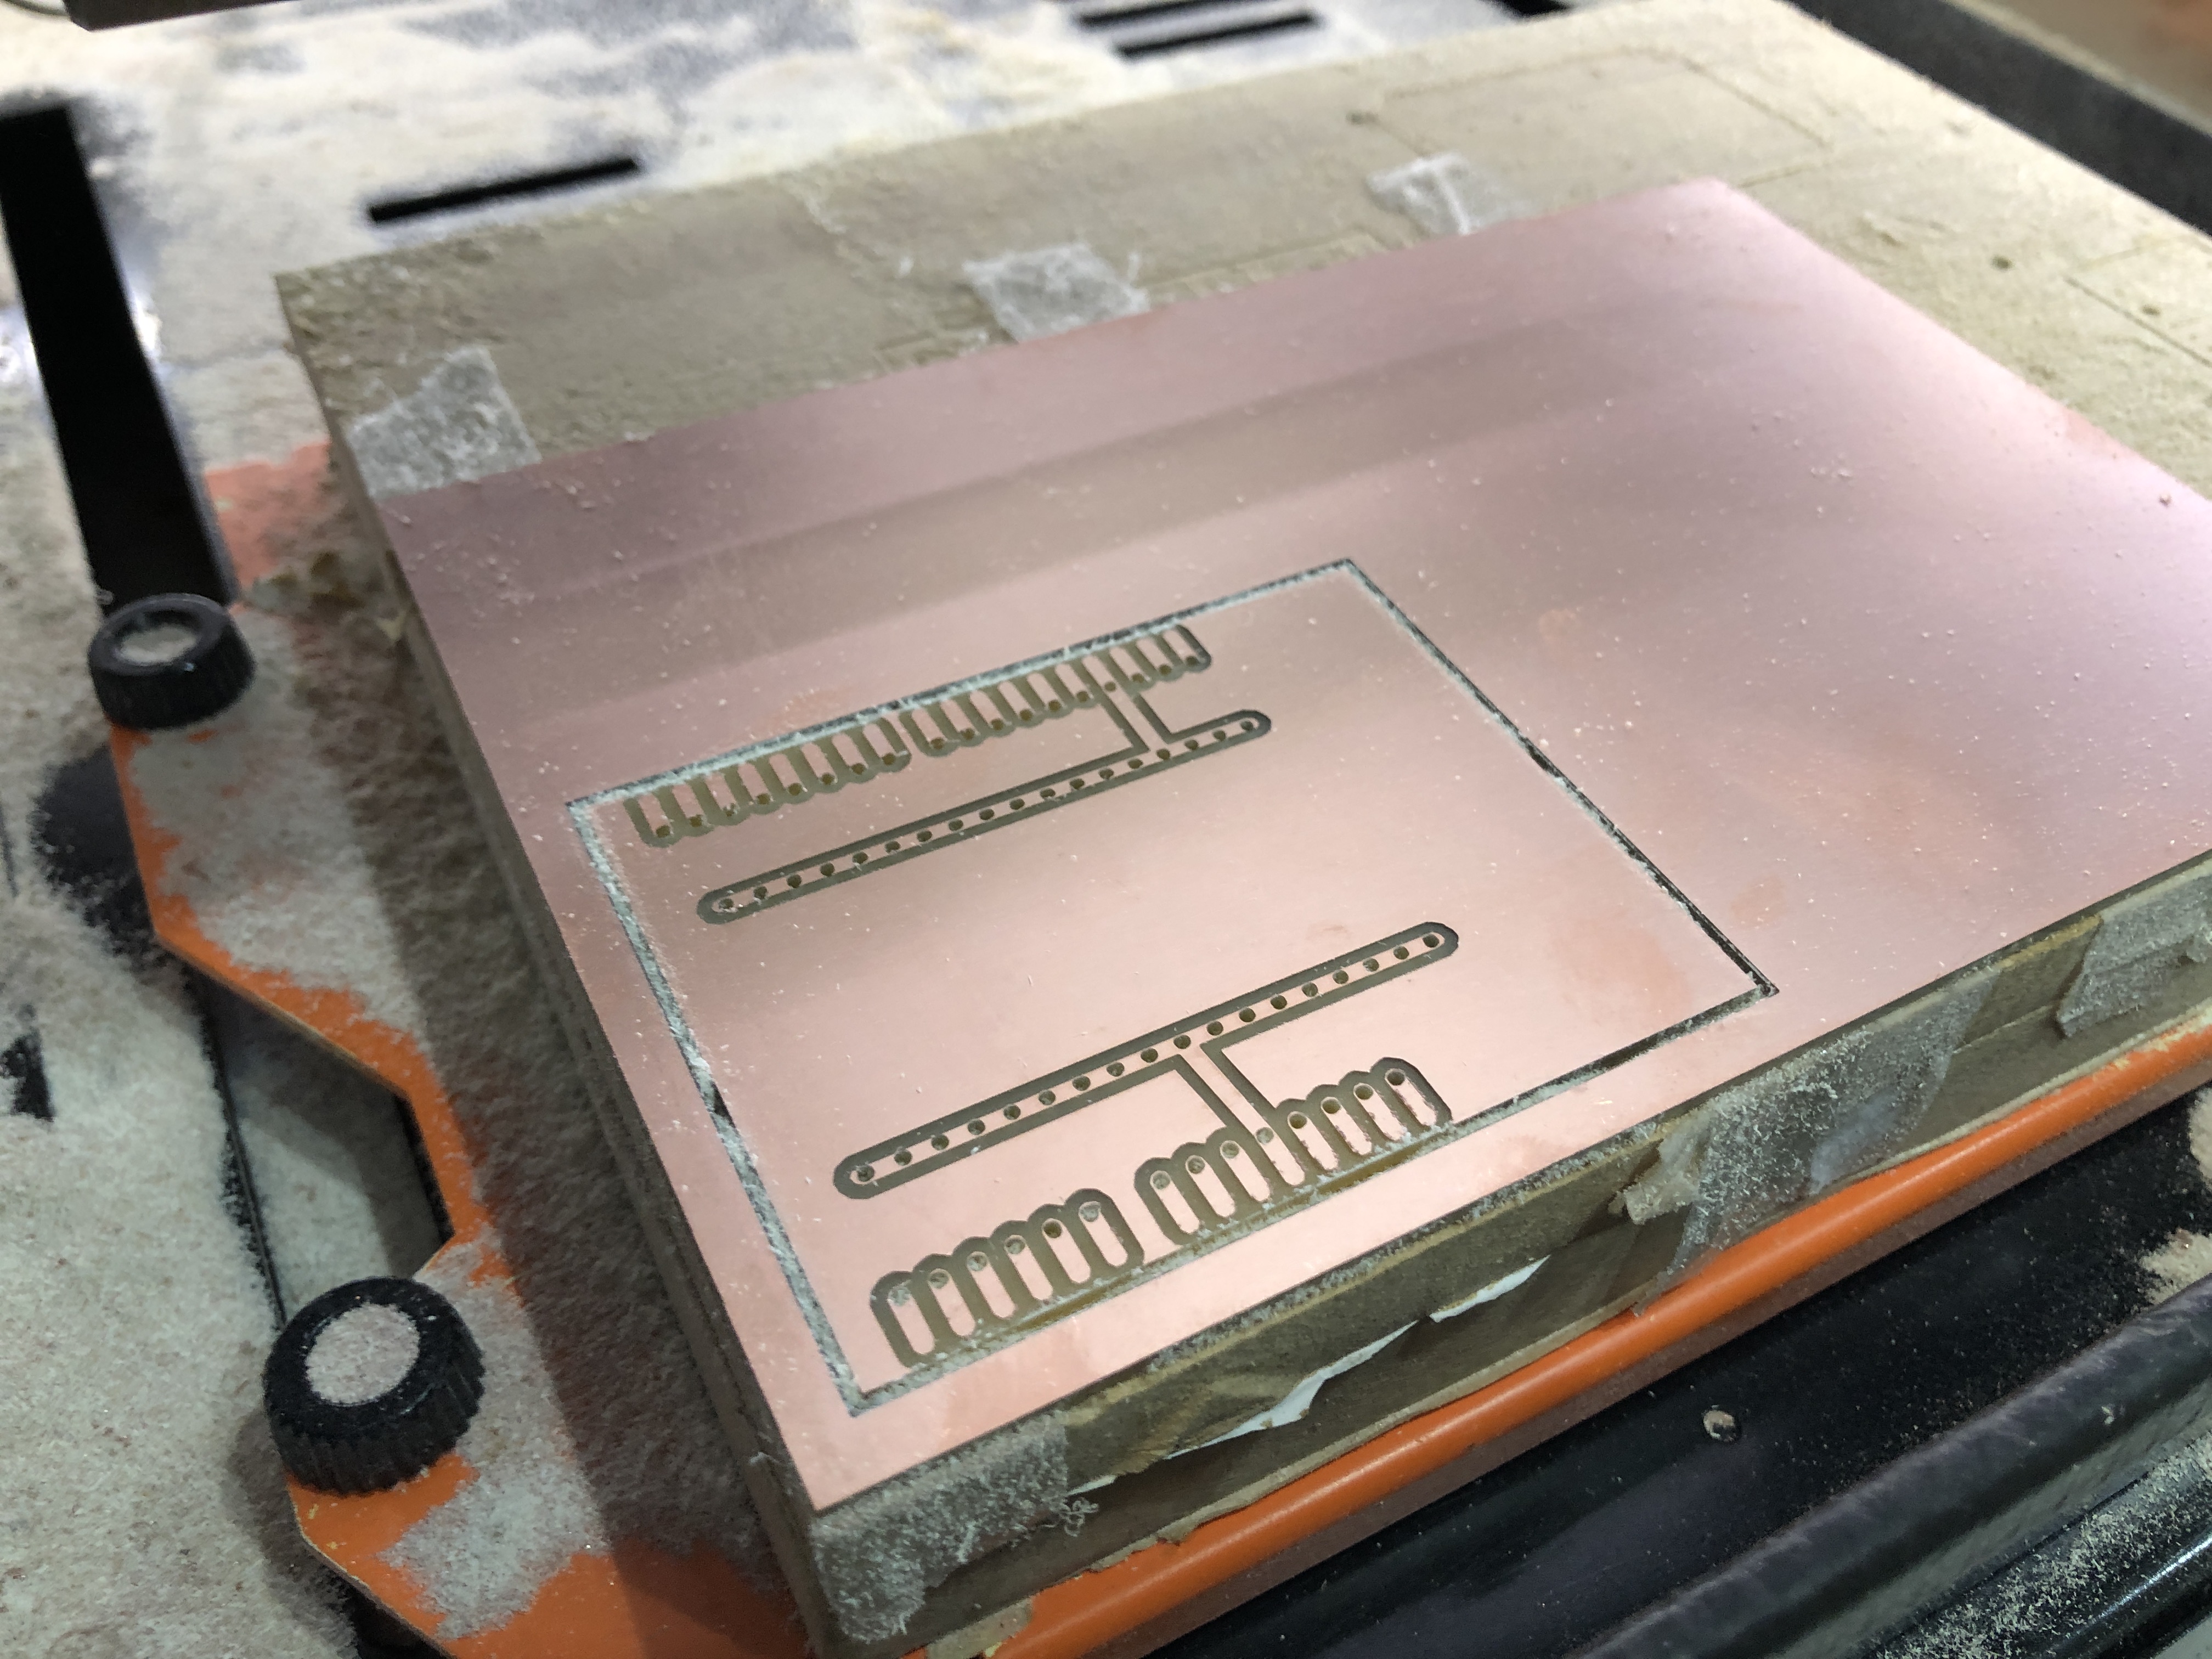
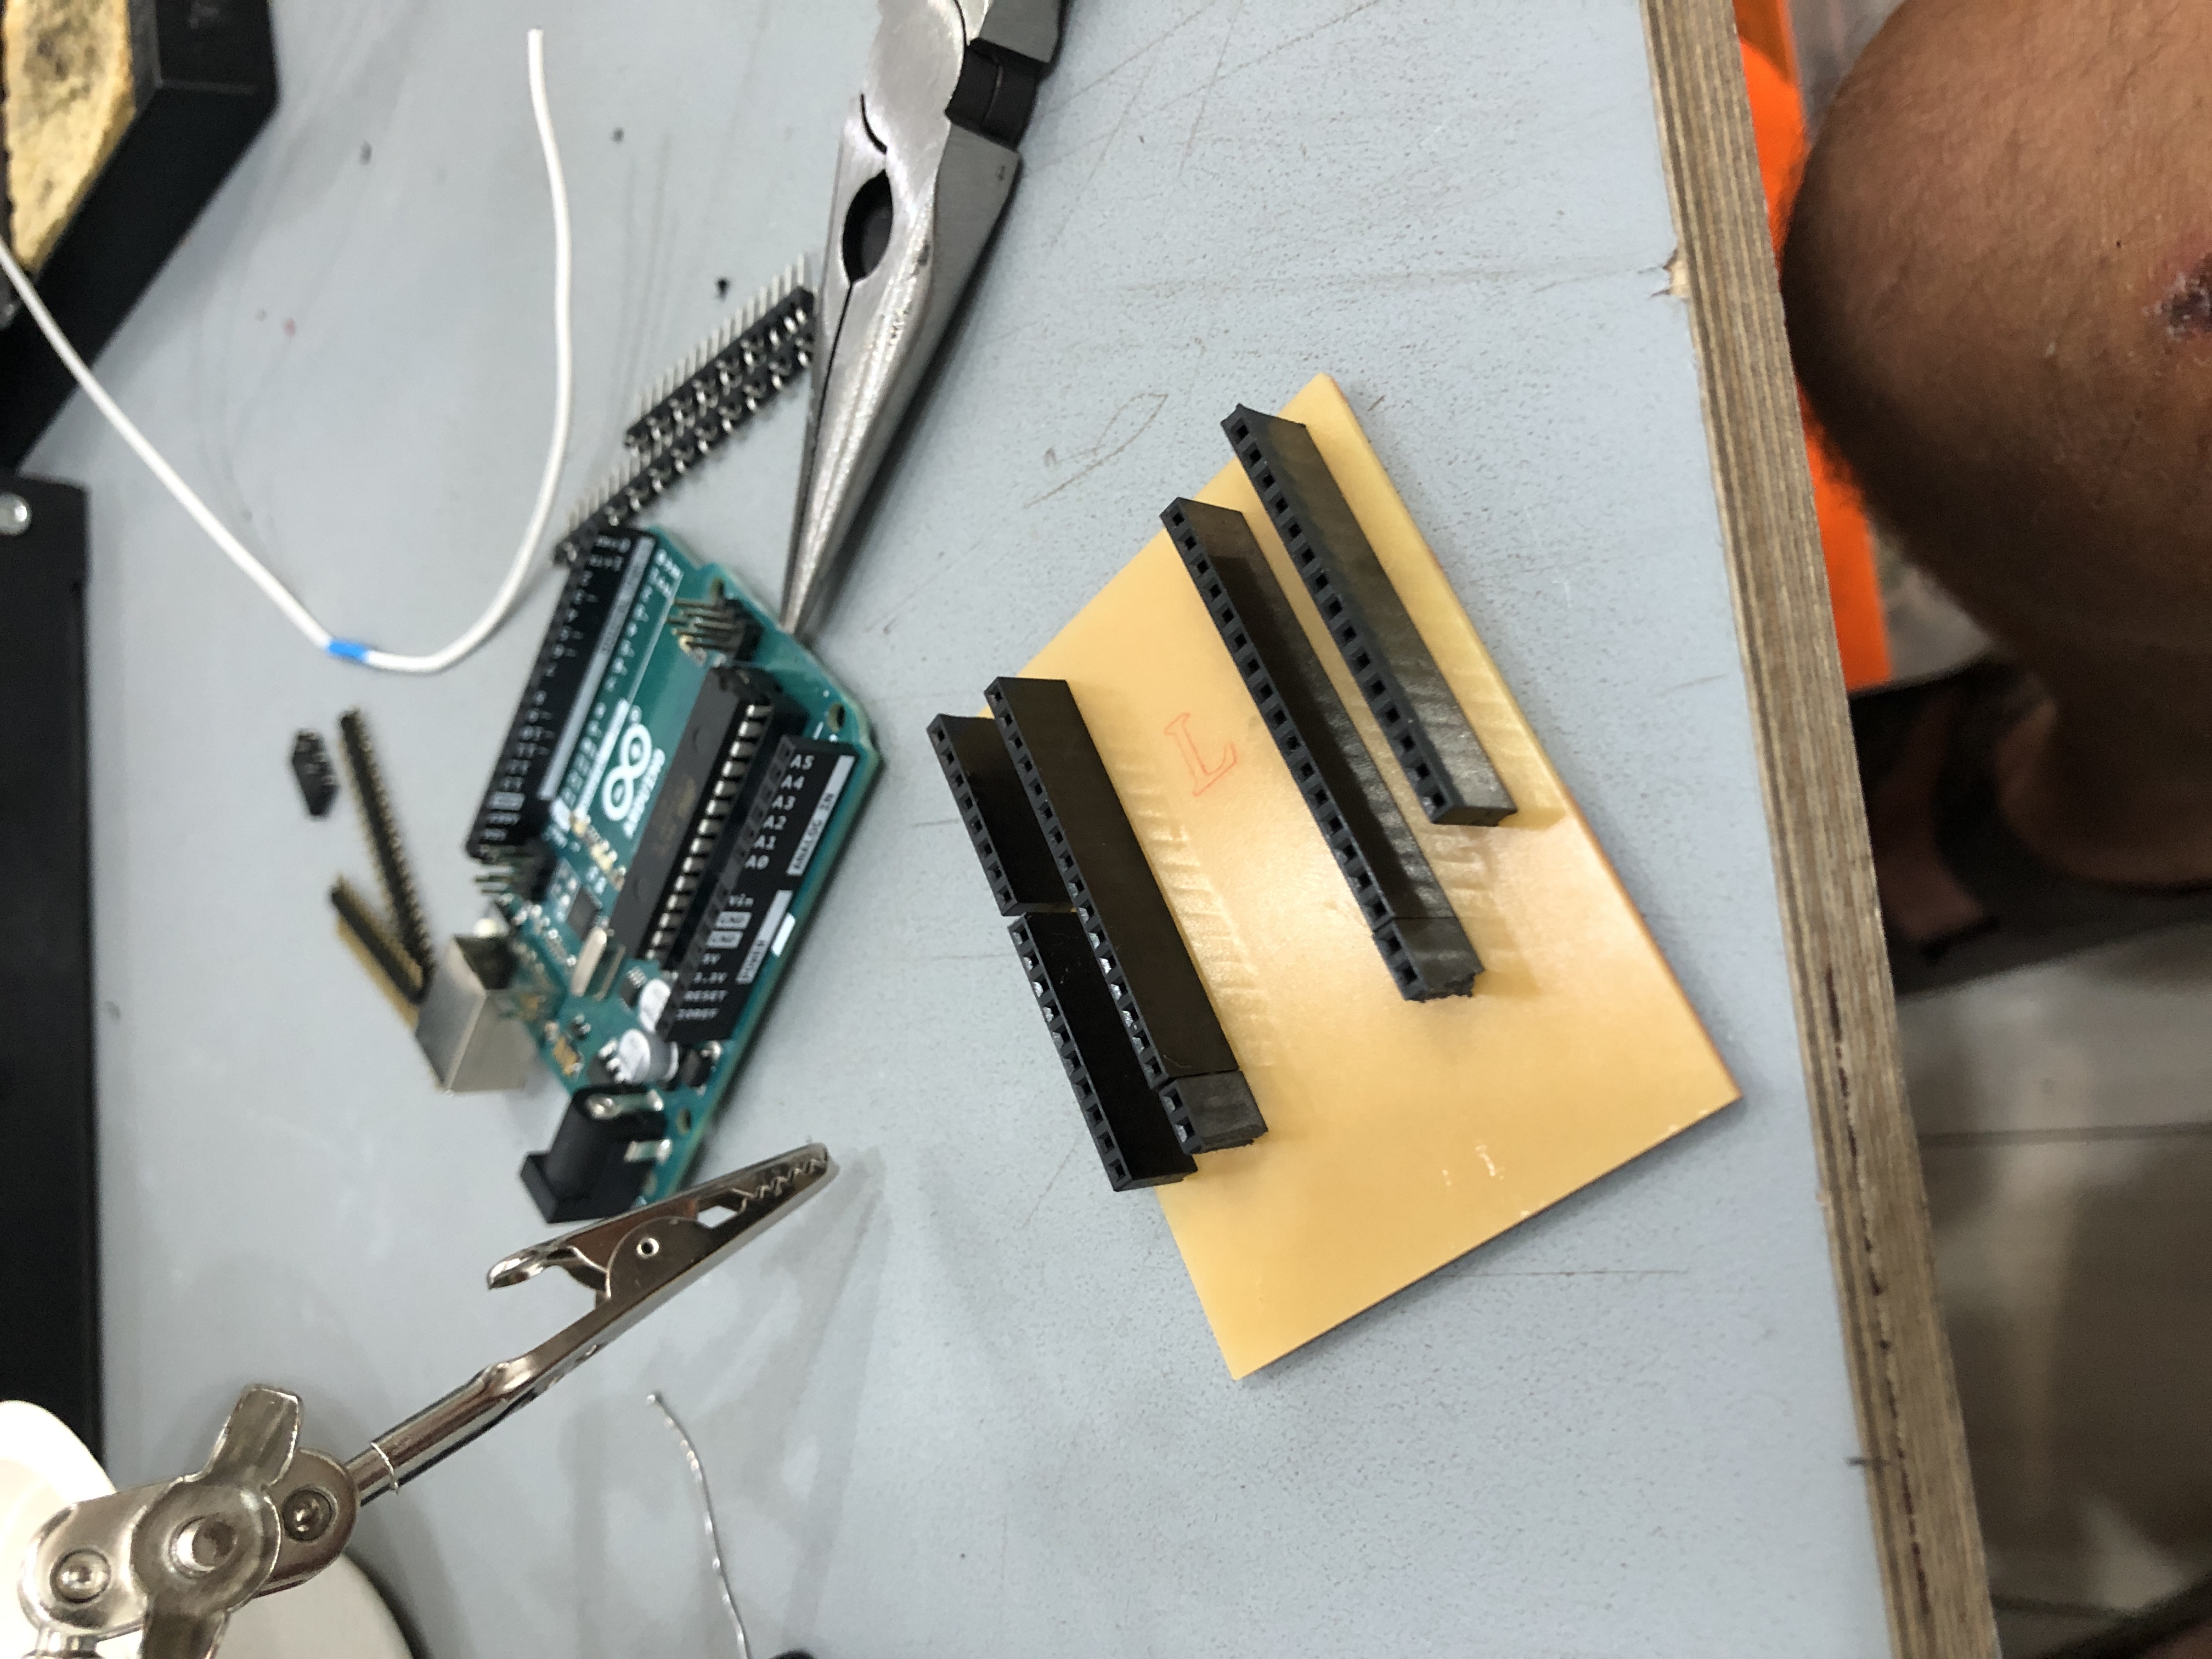
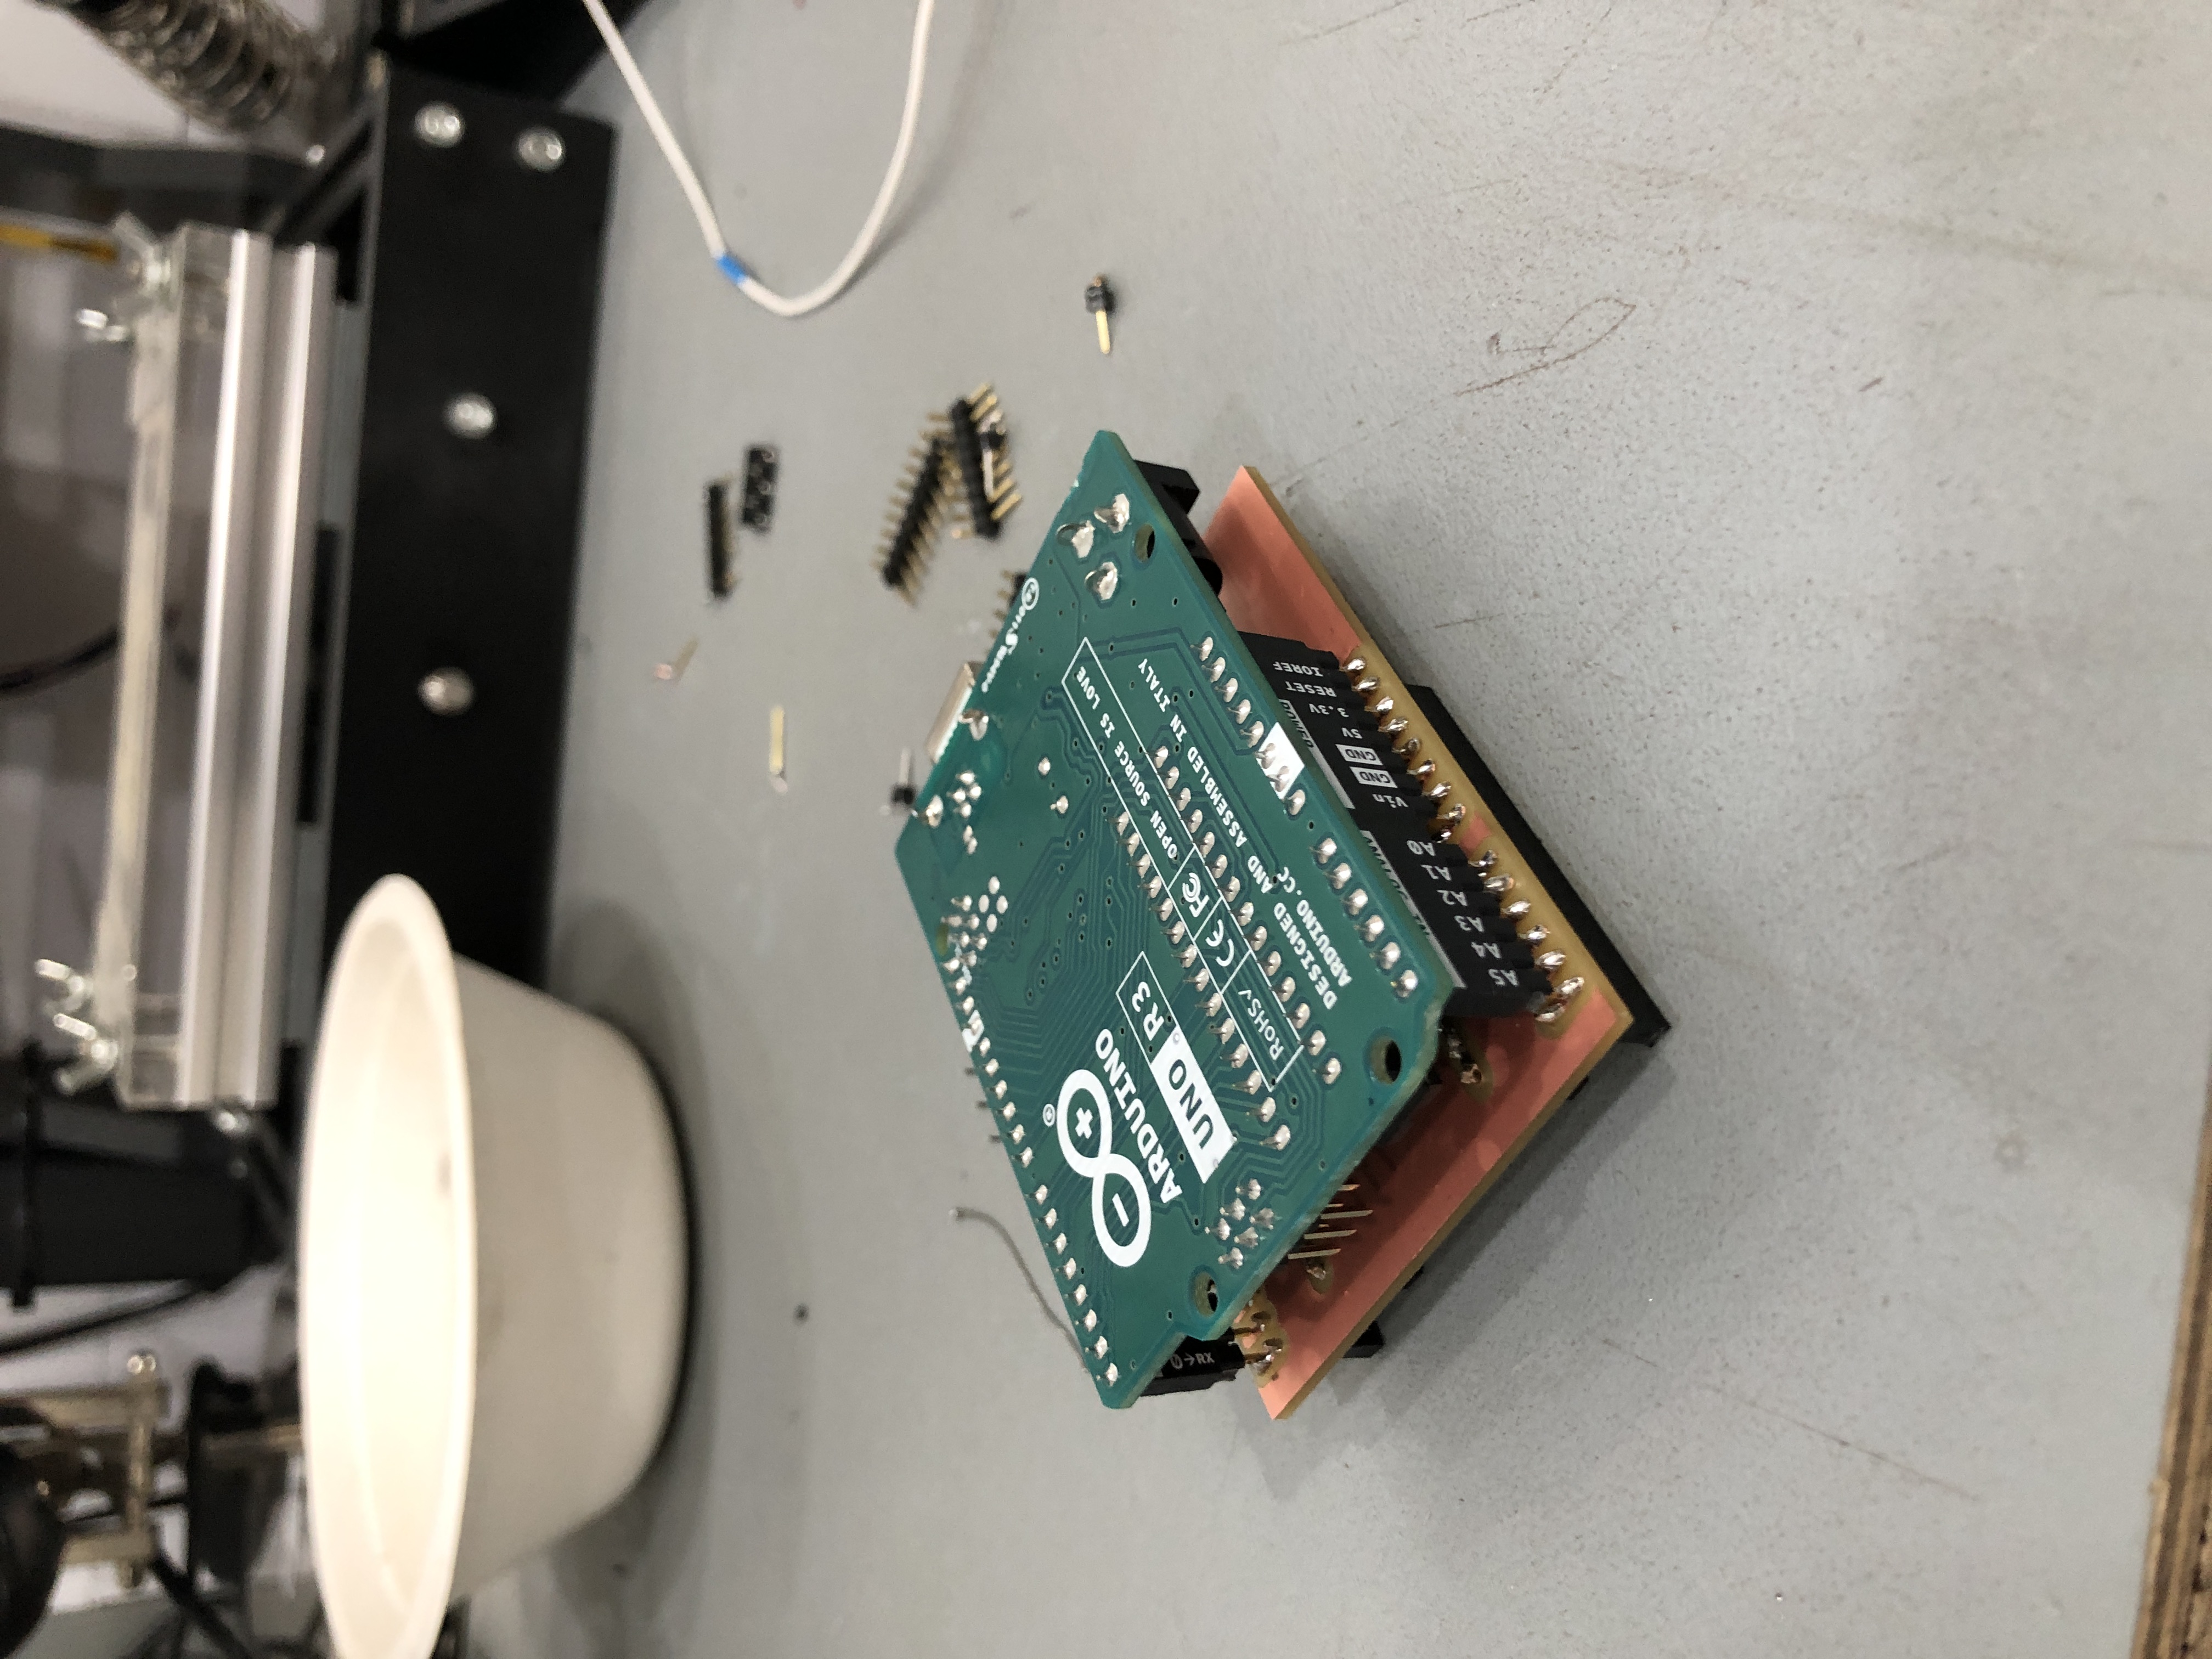
Milling and Soldering an Arduino Shield
Chris was responsible for designing, milling and soldering a Arduino Shield to multiply the GND and 5V outputs for the controller.
Some notes on fabrication
Trace mill: min. 1/64” Outline mill: 1/32” Trace seperation: 2.55mm Minimal trace width: 0.35mm Trace clearance: 0.4mm Hole diameter: 1mm
Iteration Process (spiral development) For the input cases
Cardboard prototype -> breadboard electronics -> 3D printed casing -> button biomaterial moulding
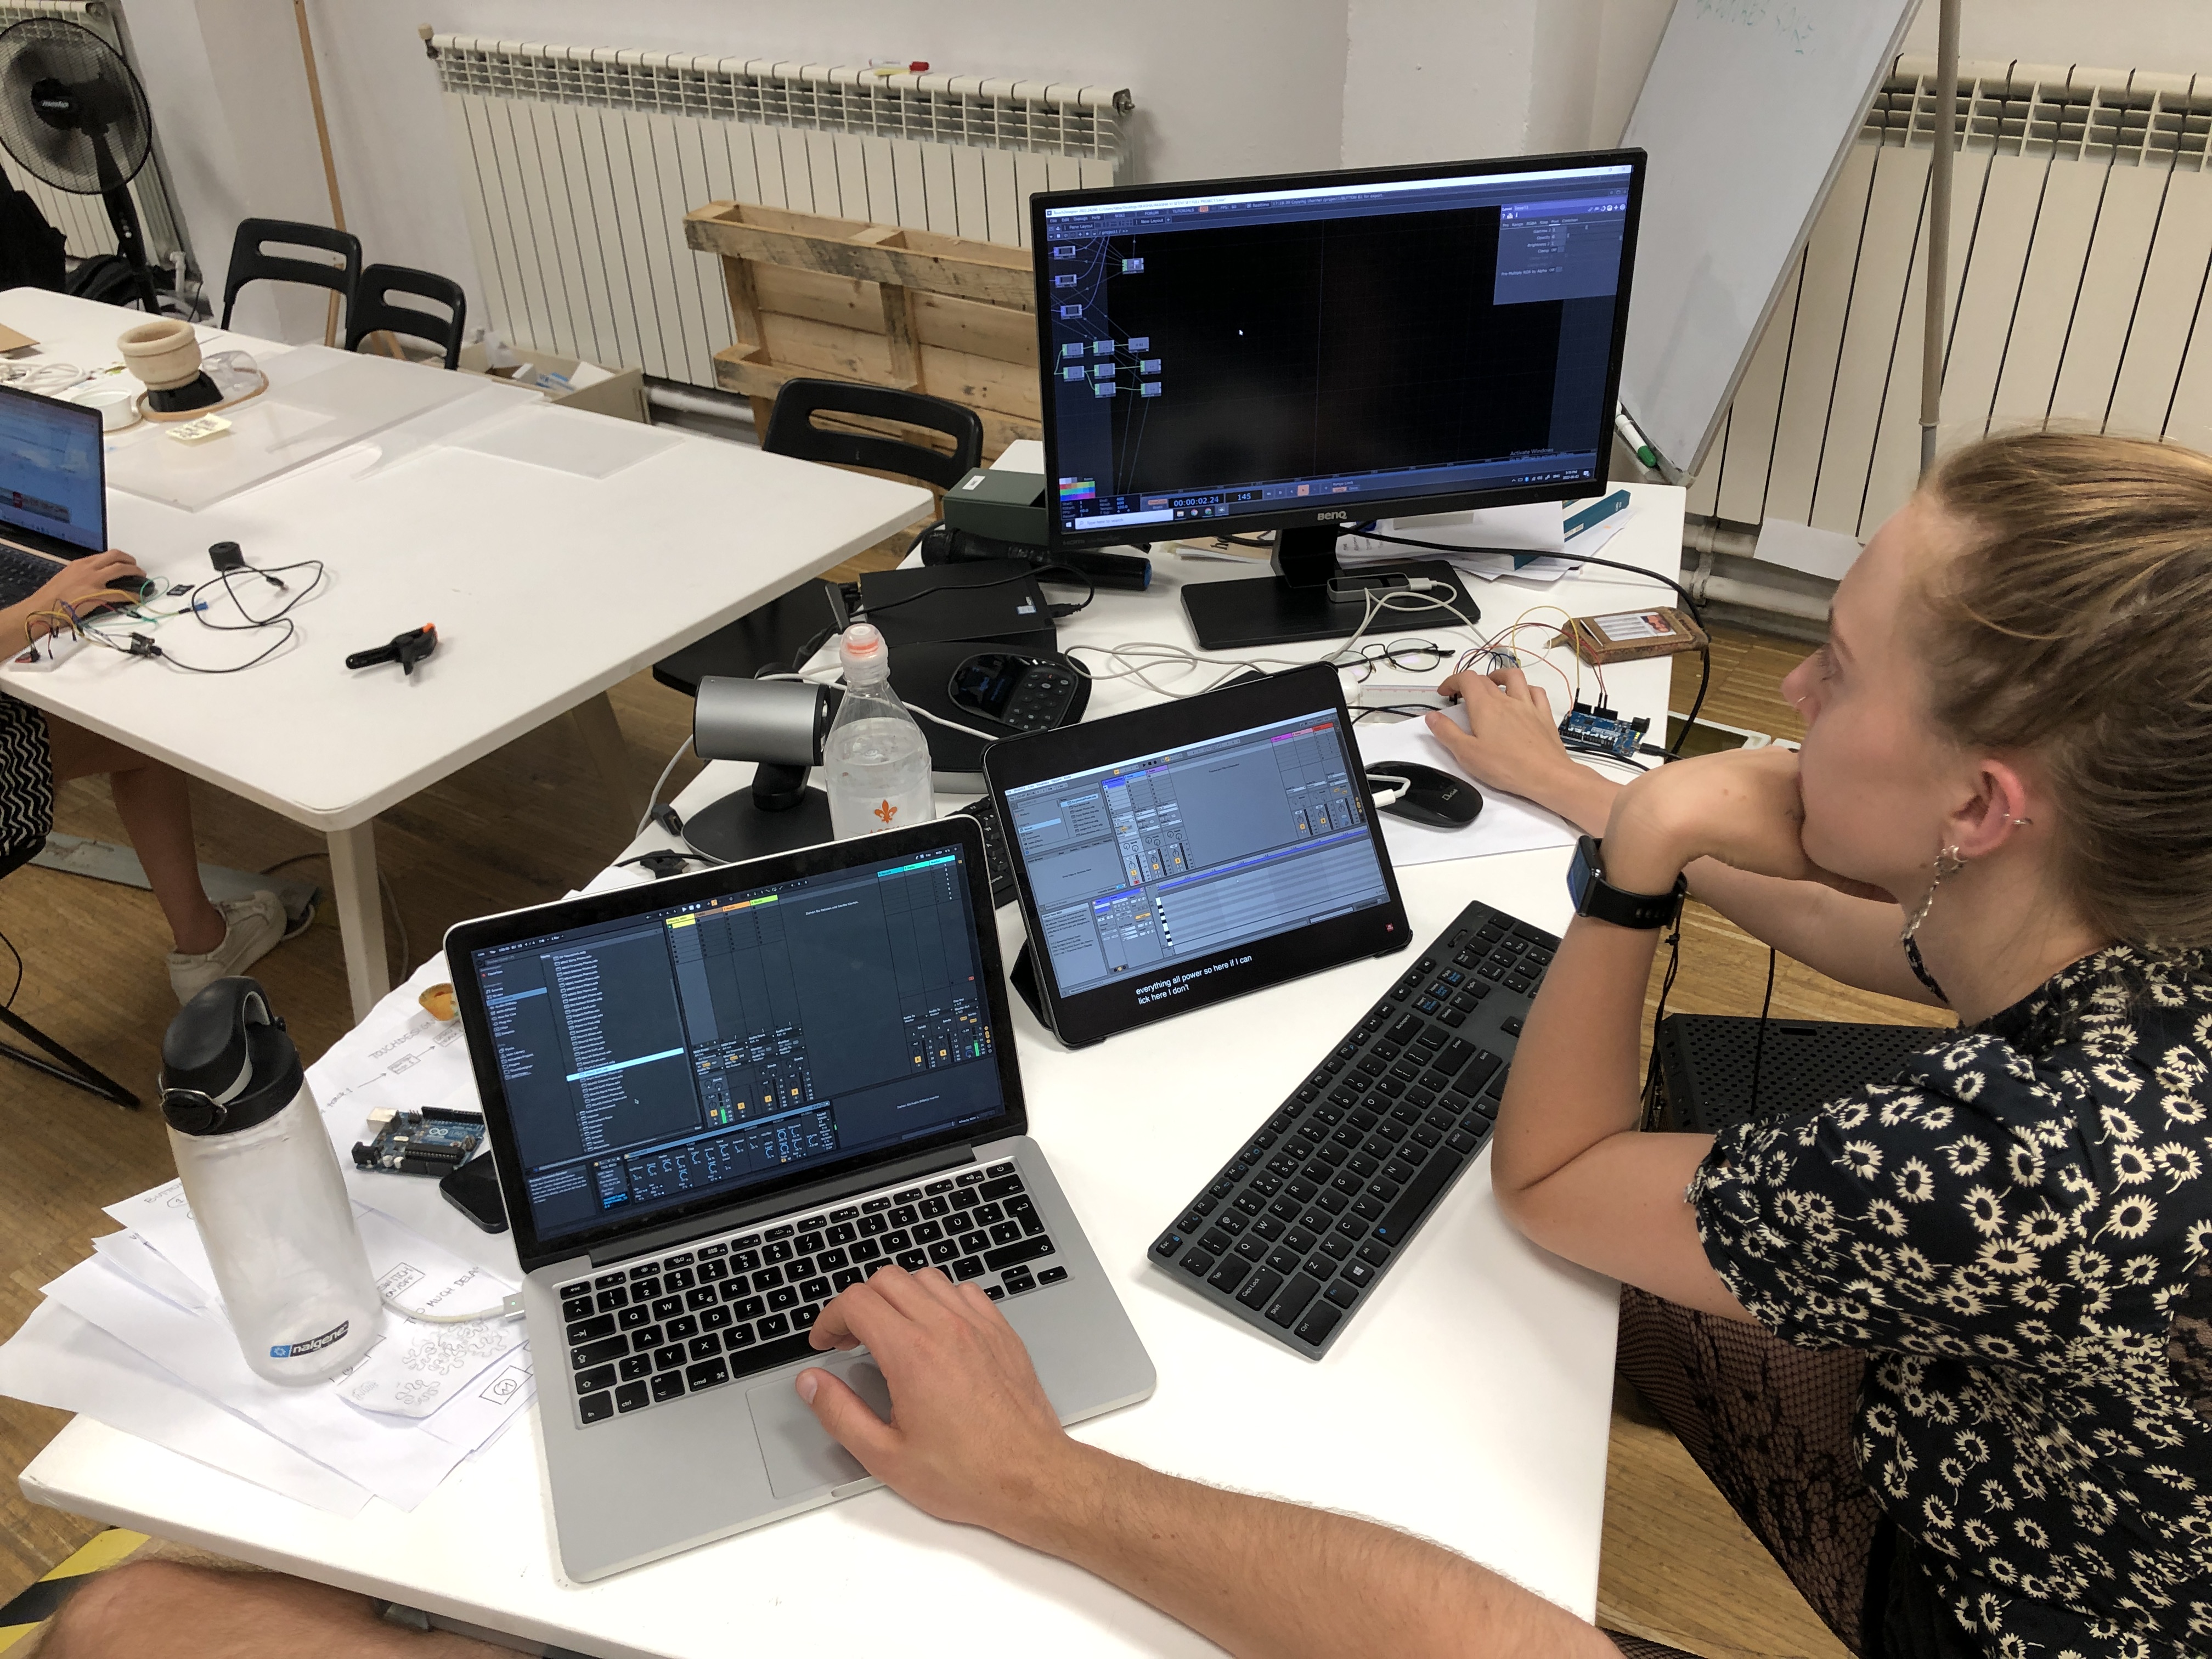
For the audiovisual pipeline
Understanding OSC protocols with TouchOSC app communicating with Touchdesigner (just to get familiar with IP addresses and ports) Receiving data from Arduino by using Serial DAT (operator node which receives serial data) Communicating interchangeably between Touchdeisgner and Ableton, using TDAbleton over IP address In both cases, we scaled up the difficulty over time, once we understood the basics of the software or technique.
Described problems and how the team solved them As always, we had many bugs in the code, within the protocols and we often had to
Out of all challenges, however, this was the one where we faced the least difficulties because we were so prepared and determined to getting things done, but also because we distributed our skills well and evenly without experimenting too much. It’s always important to balance the experimenting enough to be out-of-the-box, yet be rigorous with time and organisation in order to finish within the deadlines.
Dealing with uncertainty + Don’t be afraid to make mistakes
The IAAC wifi sucks. Especially when there are dozens of students git pushing and uploading last minute files onto the repo. We were actually really disappointed with our final presentation because we were looking forward to showcasing our week of hard work to the class and professors, but the wifi bandwidth was not stable enough to maintain a connection between Tatiana and Chris’ computer, which meant that Touchdesigner and Ableton were not able to communicate.
This is something to keep in mind for the final show, but maybe it was a way of us not “spoiling” the magic of the event.
Images
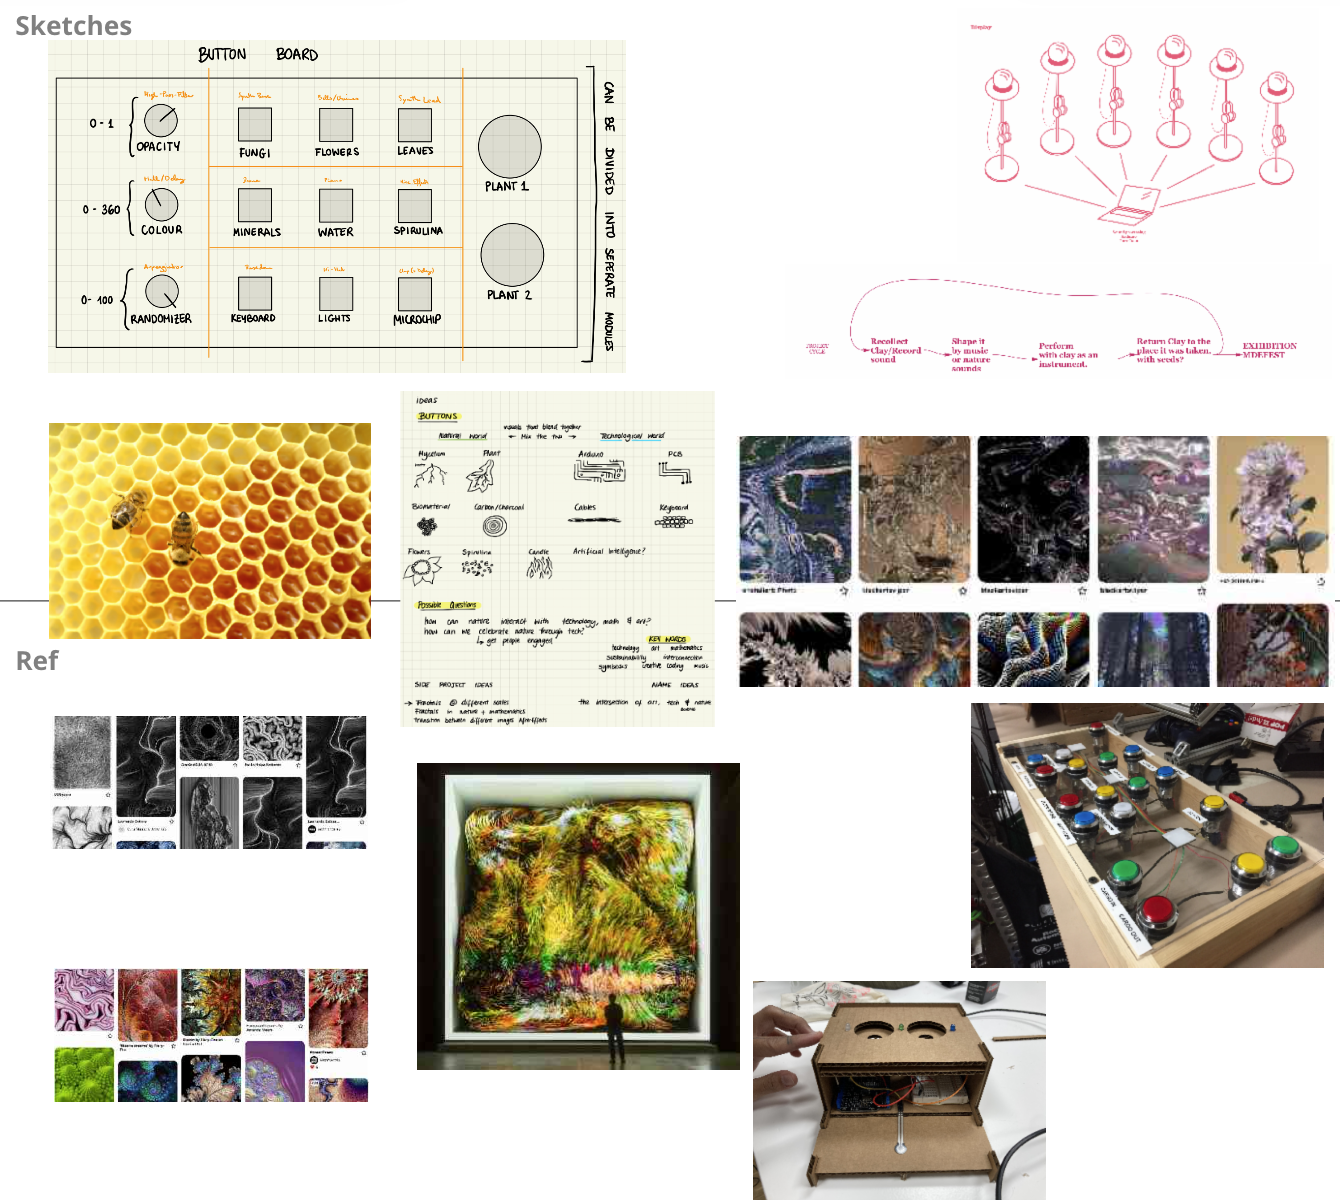
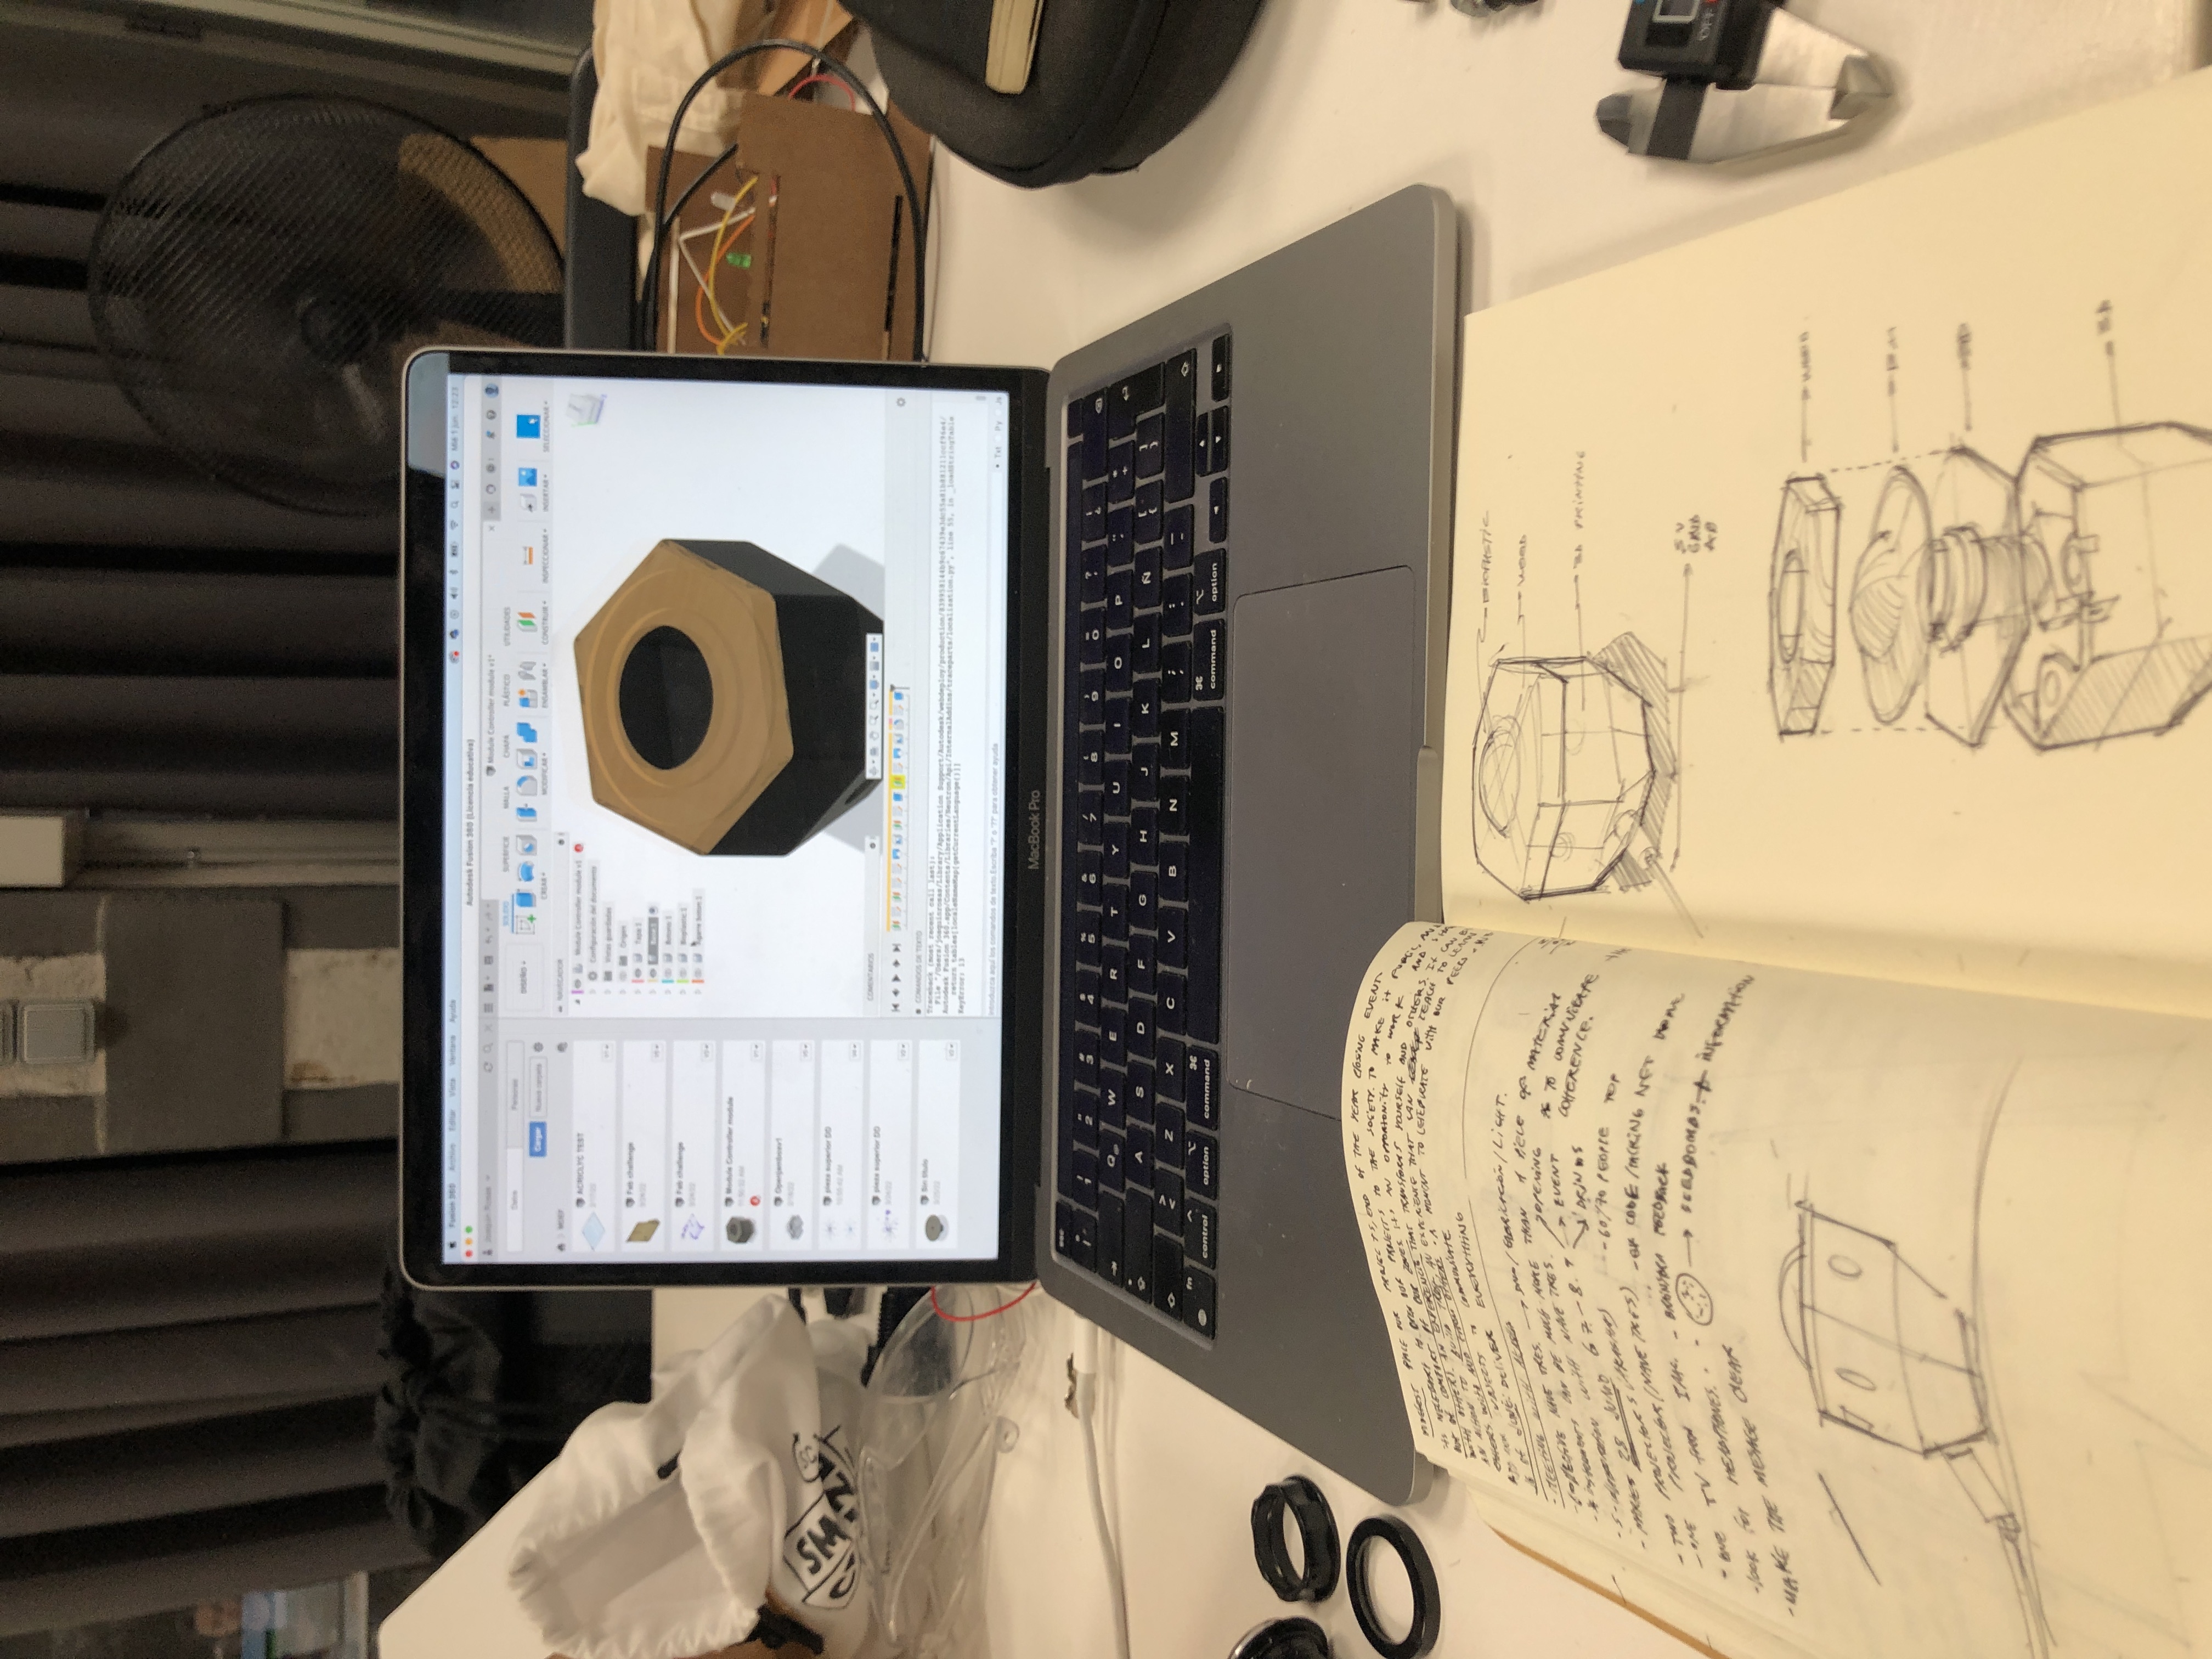
Planning the concept with references and visual languages that we wanted to use.
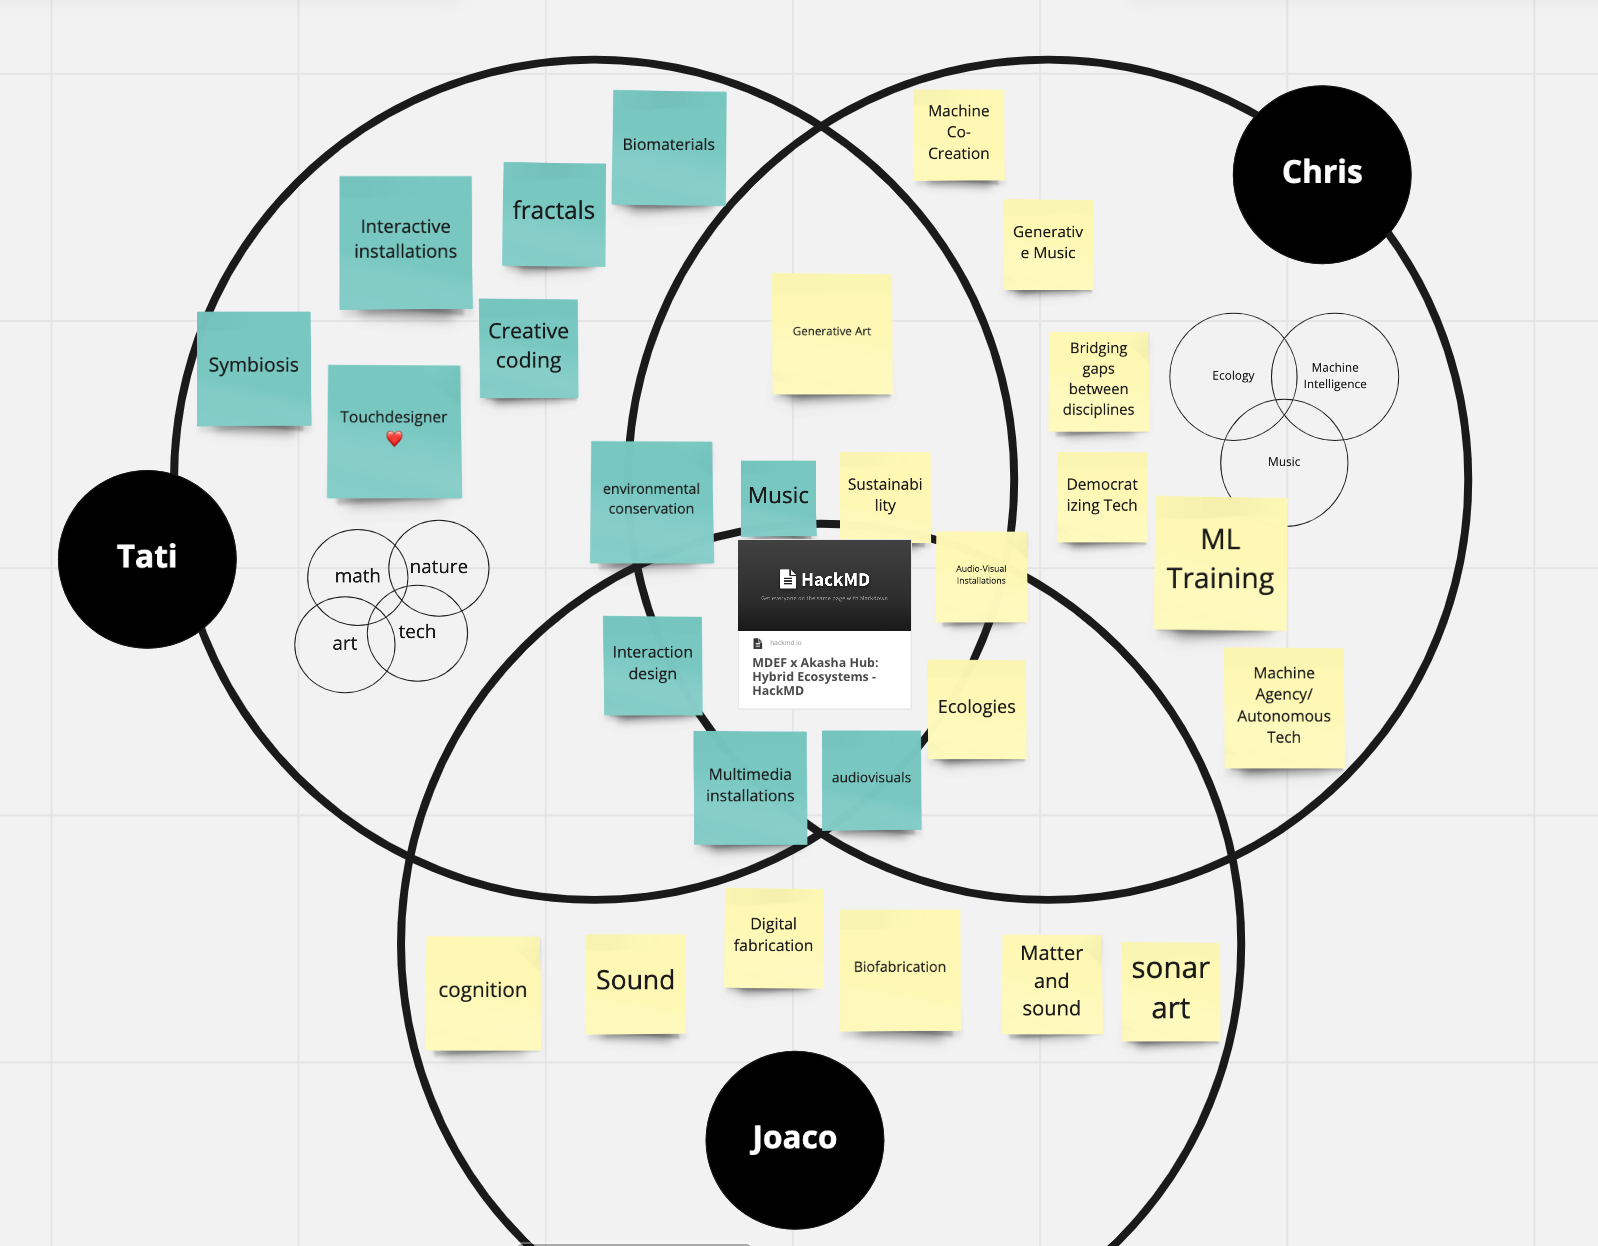
Common concepts that we shared.
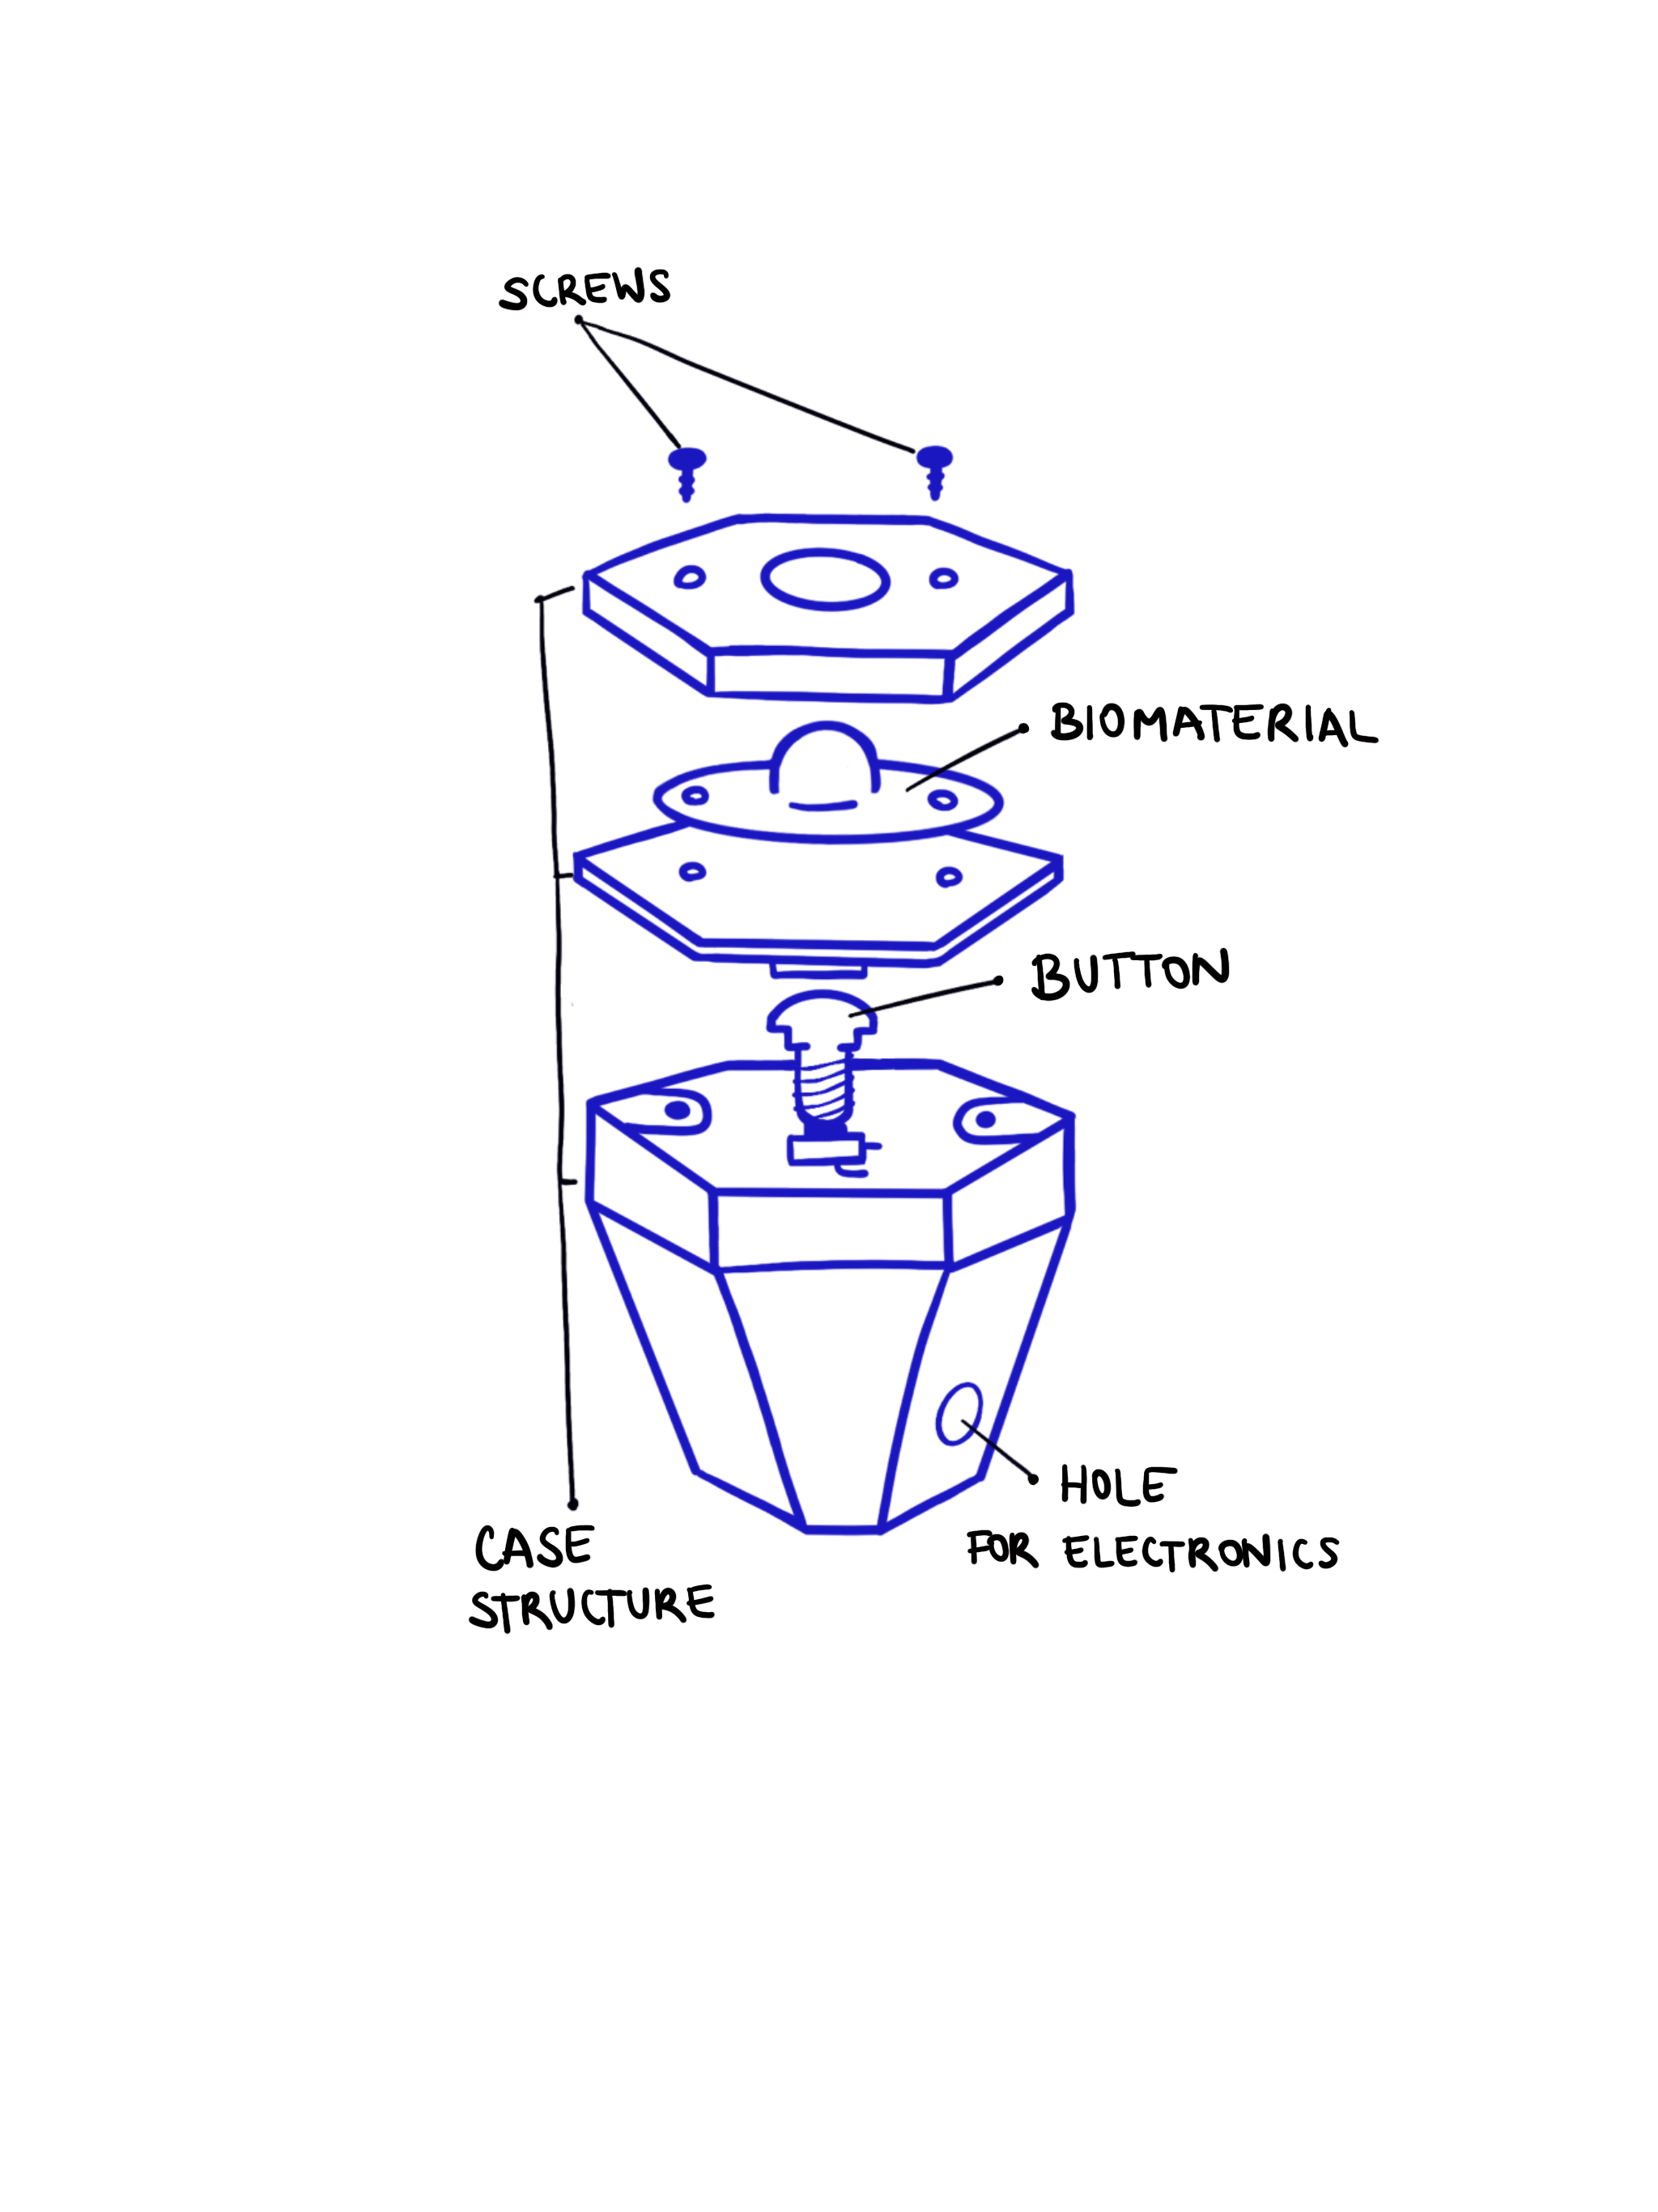
Diagram of the controller prototype.
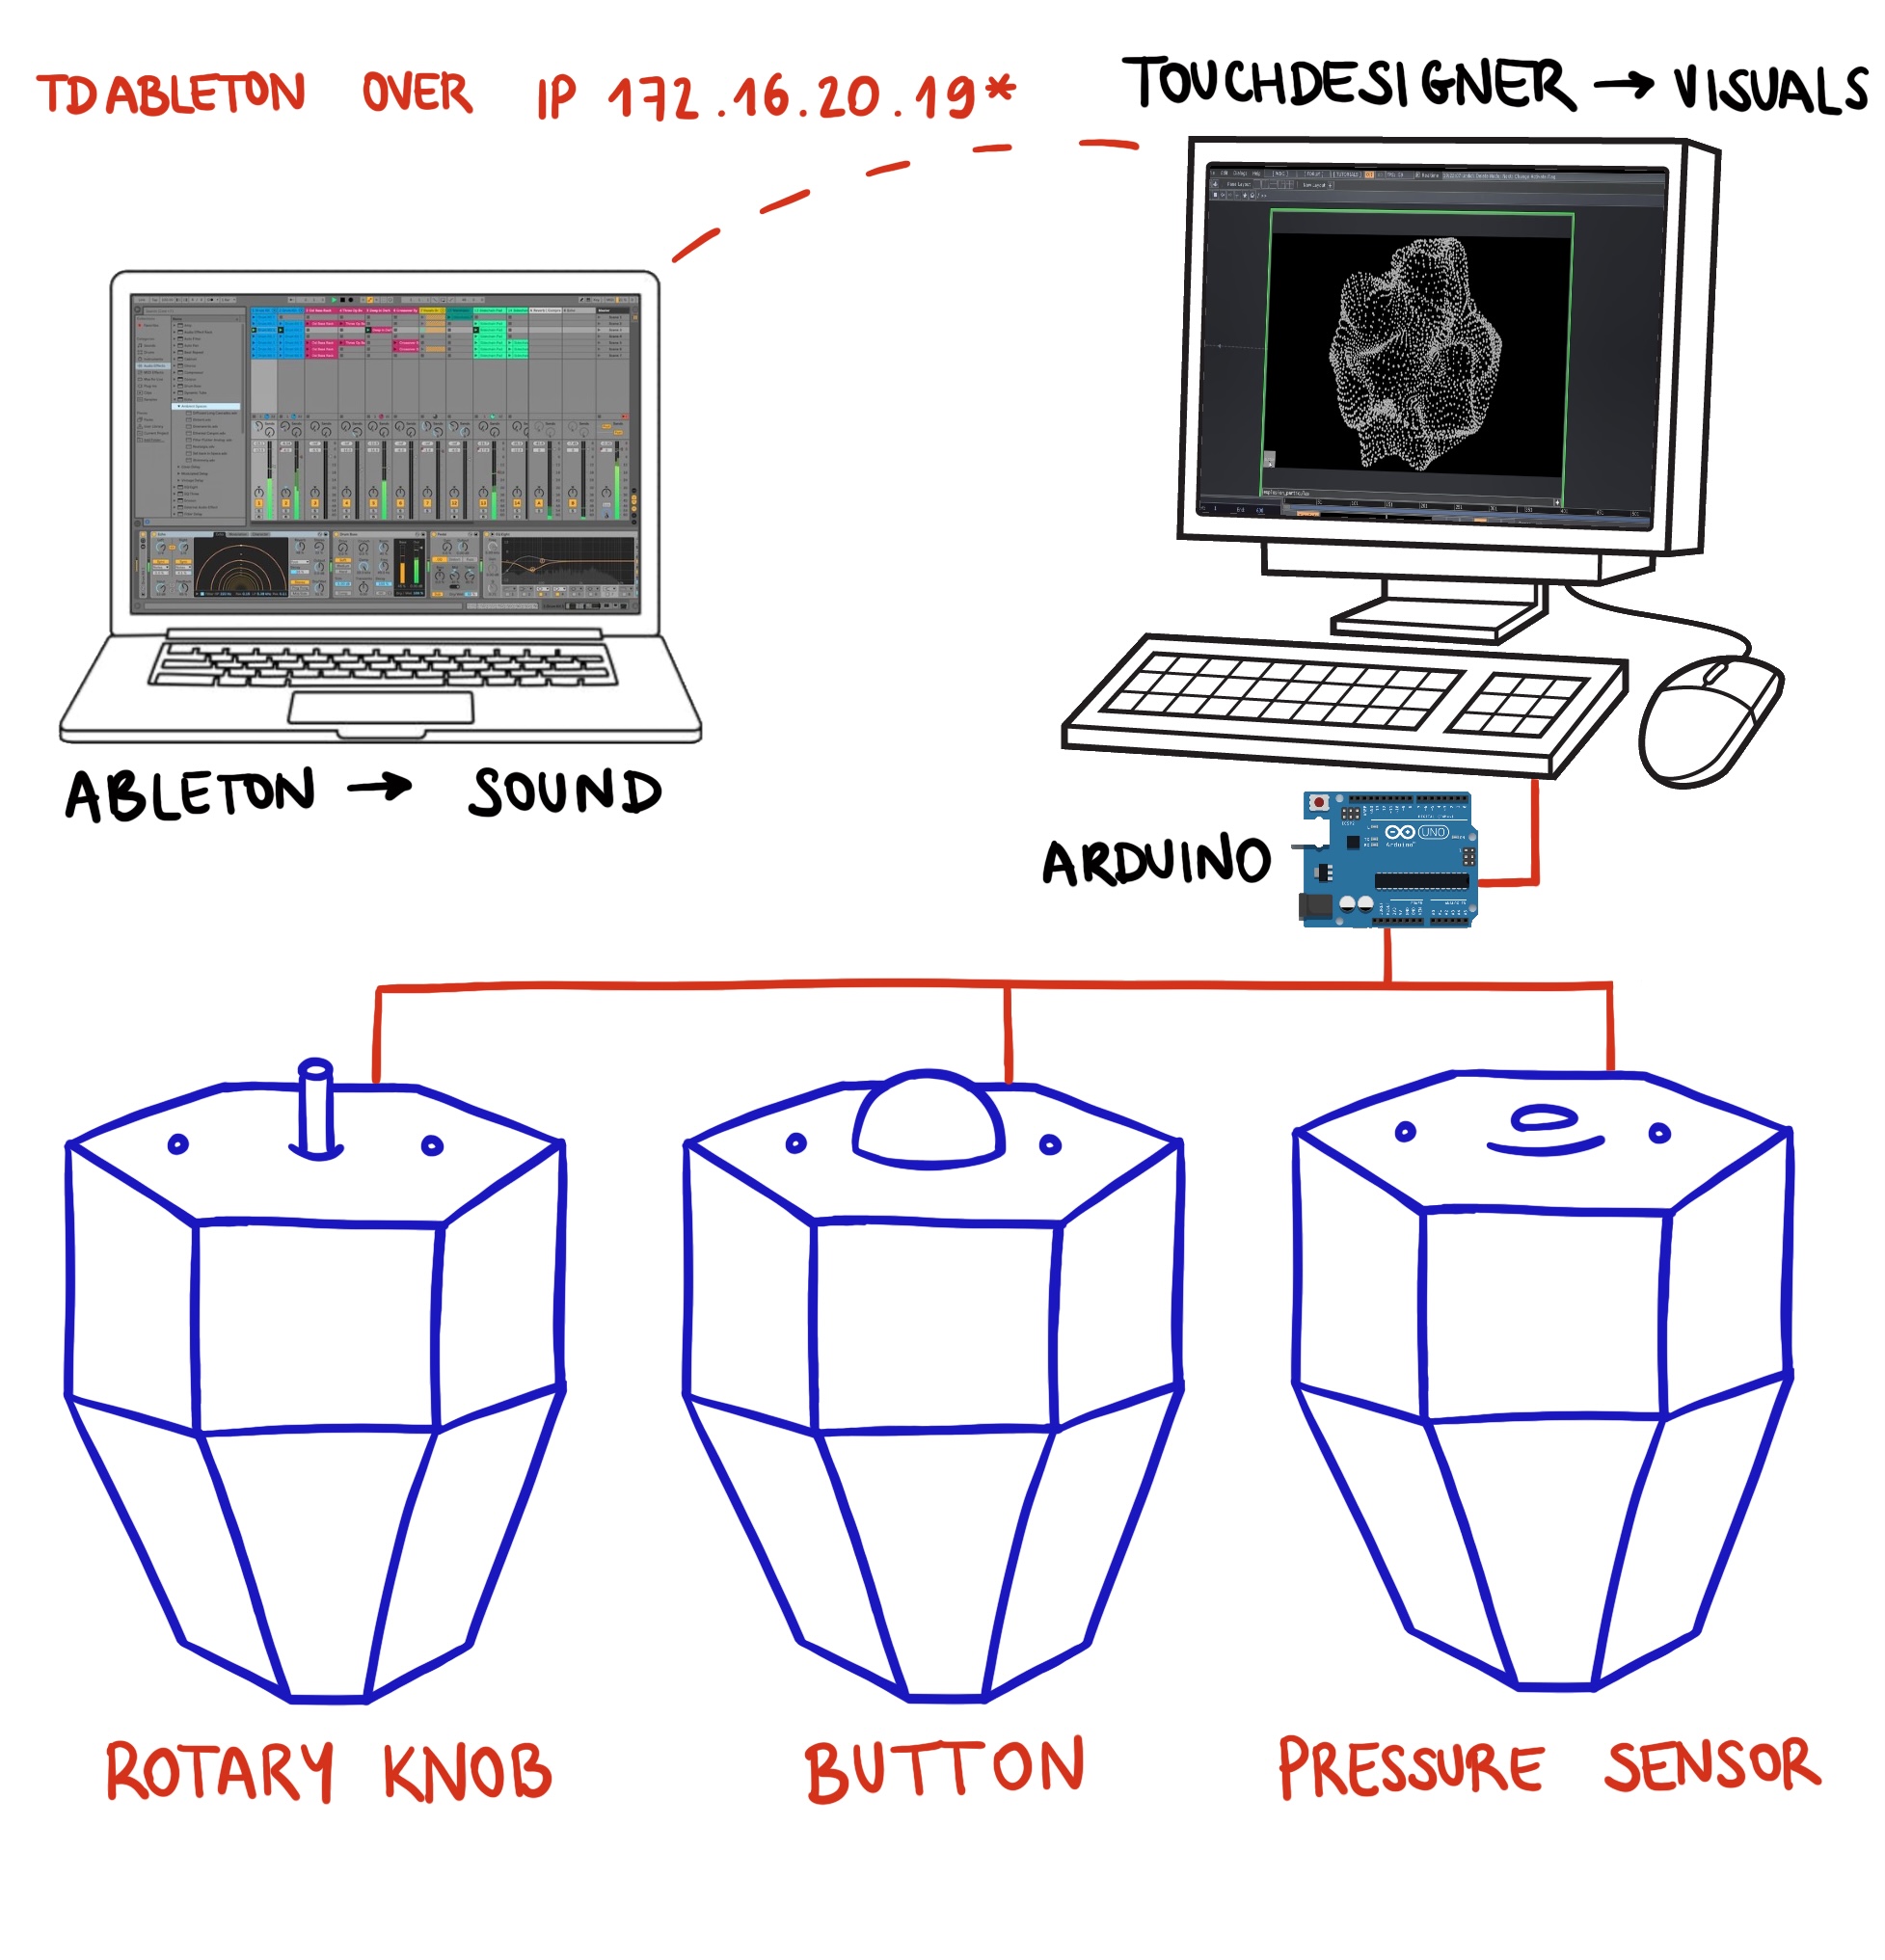
Quick diagram of the controller, arduino and connections.
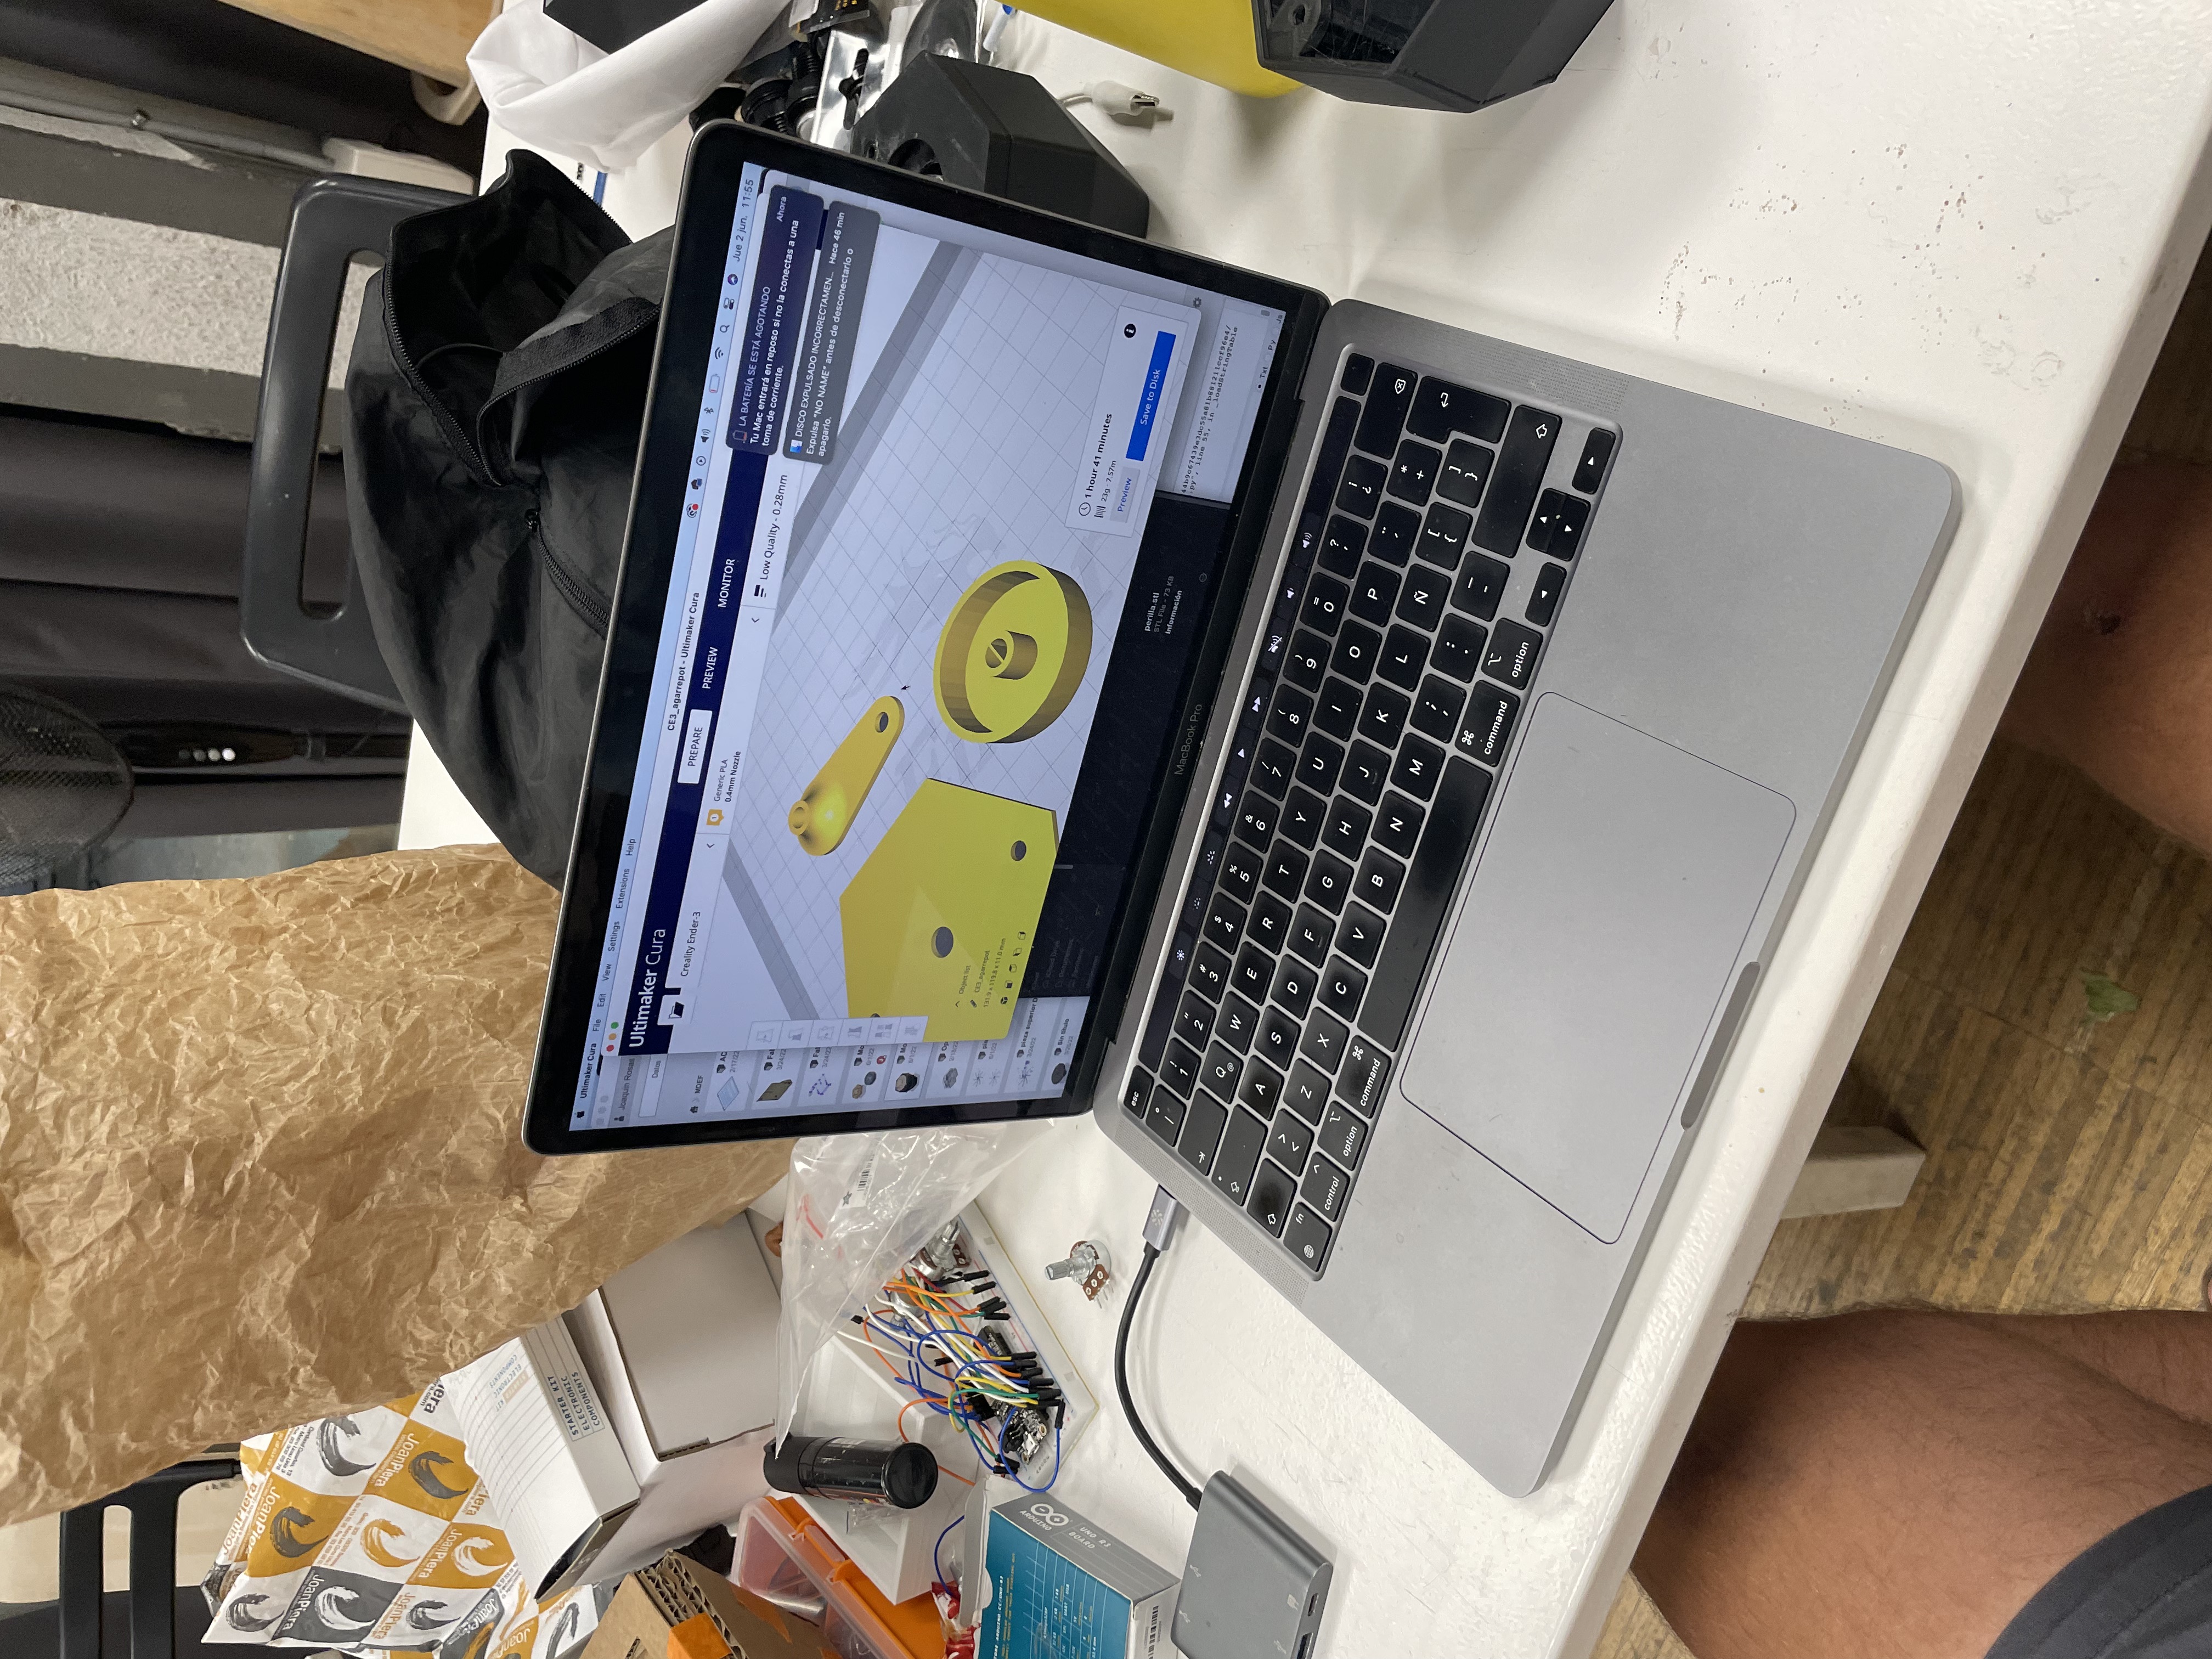
Some process of the contruction and built of the controllers. Including 3d printing, molding and casting biomaterials, prototyping and pcb cutting and soldering.